Welcome to the most comprehensive guide of how to connect Google Analytics data with Zapier. You'll learn how to set up your integration correctly, combine it with other sources, react to your traffic/conversion changes in real-time, or store data, and analyze it later.
Google Analytics is a great tool, but it shows only one part of the story. It's crucial to correctly interpret your data and map it with other sources too. Zapier integration allows you to transition your data to different formats and perform better marketing and business decisions.
The question is, how do you properly connect Google Analytics with Zapier? Well, this definitive guide will provide an answer to you.
Let's dive right in.
Contents
Understand how Zapier works
First things first; for you to get started, you need to understand how zapier.com works.
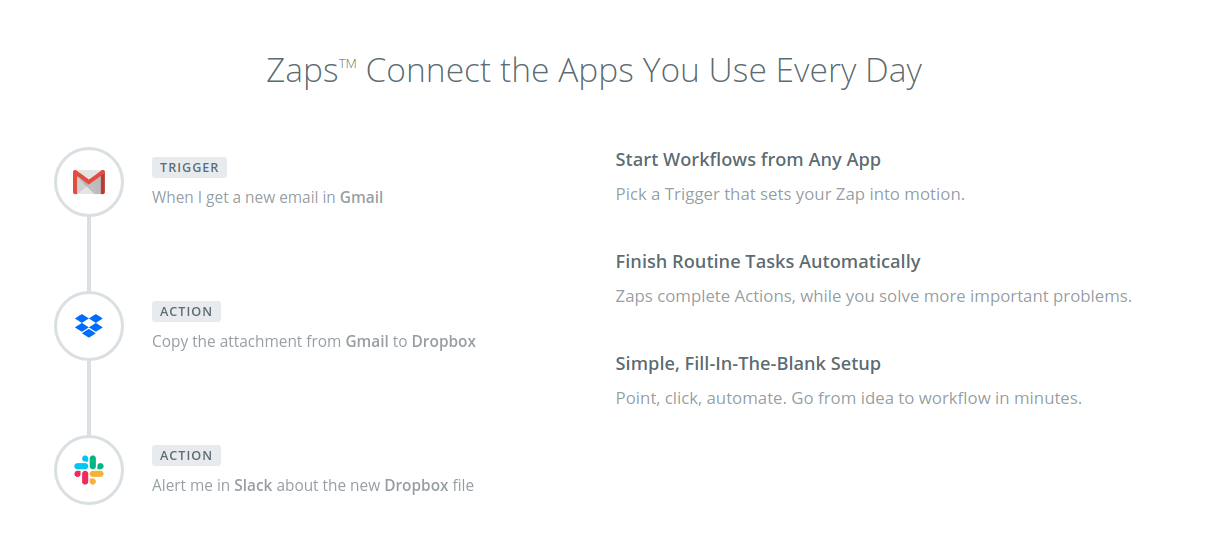
Zapier has the concept of "Zaps." You can imagine that Zap is an action or an instruction set that gets executed when certain conditions are triggered. For example, if you have a new Goal on Google Analytics (a trigger), you can then send a notification to your phone (action). Another example would be if you had no visits on your website for the last 30min during your business hours (trigger), then all colleagues are sent a Slack alert to investigate (action).
Both triggers and actions could become pretty complicated, so it's essential to not over-engineer them.
You can summarize the whole Zapier flow into 3 steps:
- If something happens, conditions are met from "Trigger", like Gmail or Google Analytics
- Then execute actions on "Target," like Dropbox or Slack
- Optionally, you can transfer some data from the "Trigger" source to the "Action" target or execute multiple actions
Register Zapier account
If you already have a zapier account, sign-in and head to the next section. If you don't, go to the zapier.com/sign-up.
You'll see 3 options:
- Sign up with a Google account
- Sign up with a Facebook account
- Sign up with an email

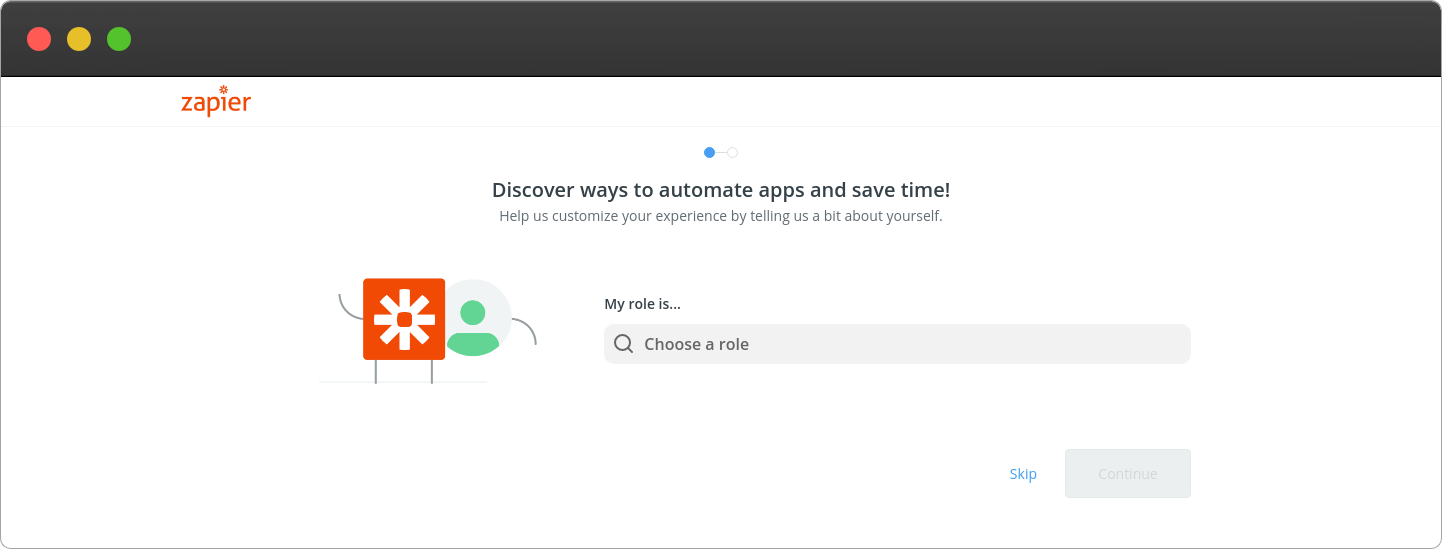
Choose the most convenient signup method for you, and you'll land on a page asking for more information. Feel free to click "skip" at the bottom right:
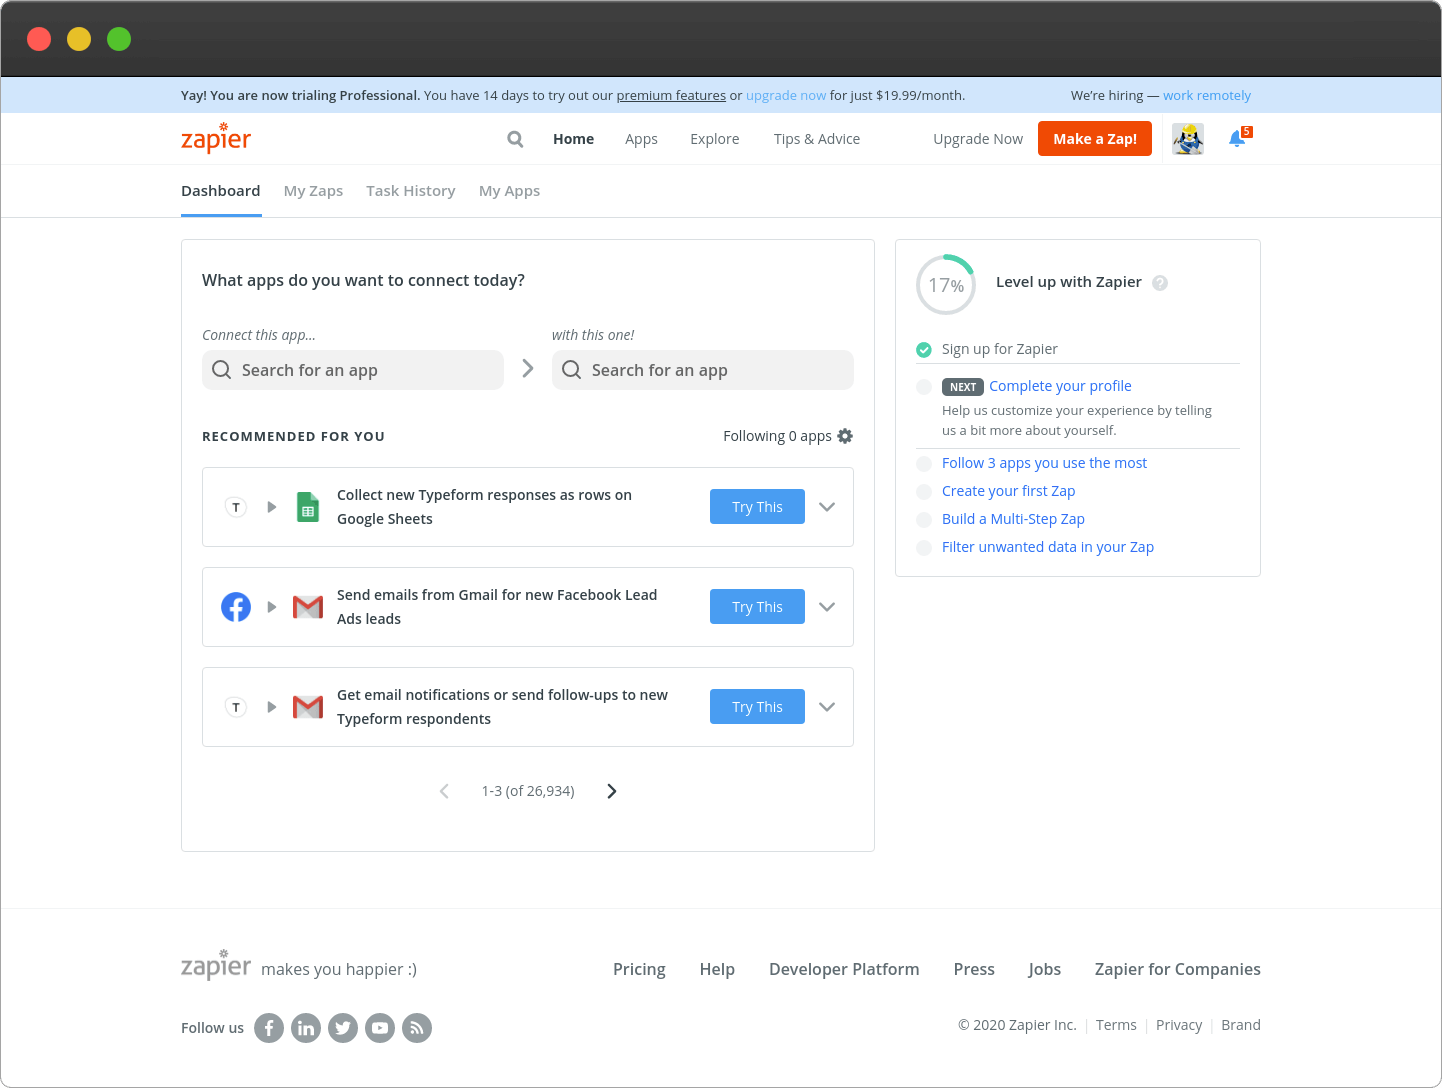
After this, you'll land on your personal dashboard, where you can start connecting your Google Analytics and make Zaps.
Head to the next section to learn how to connect Analytics with various other tools.
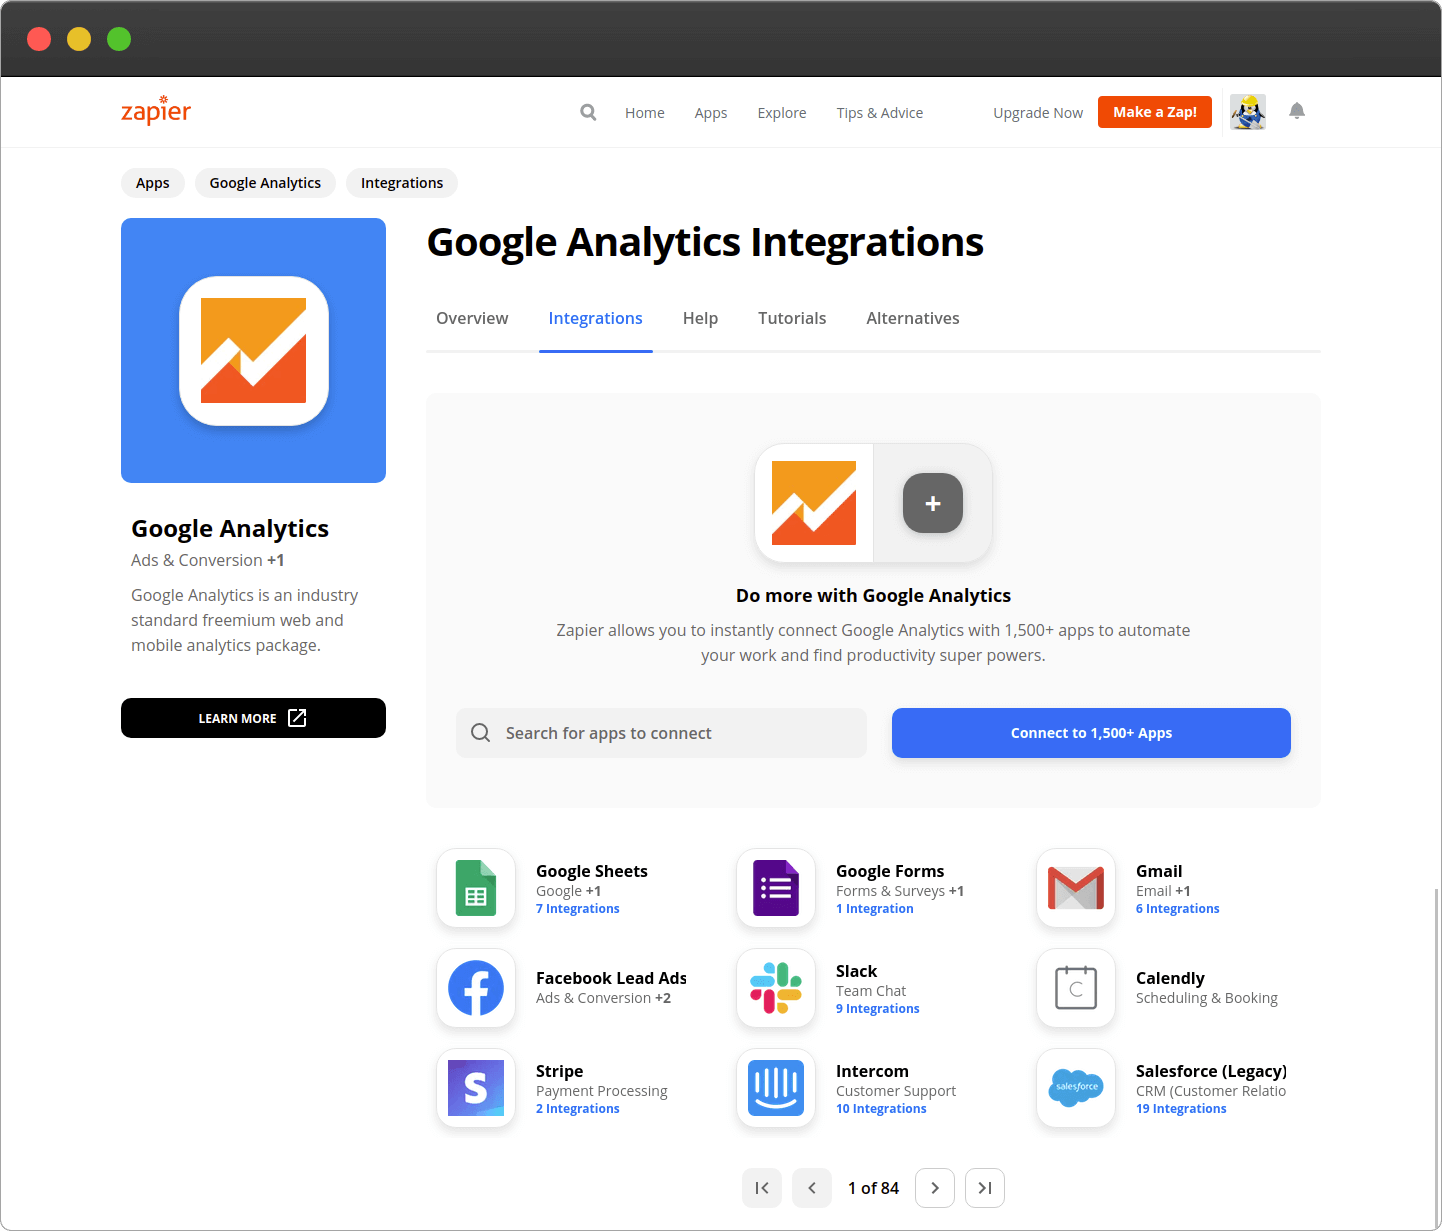
Connect Google Analytics and Zapier (1st method)
This method is the default one and requires only Zapier and Google Analytics accounts. It's a straightforward way, and there are many examples on the Zapier's page. However, it has quite a few downsides and limitations that you have to keep in mind.
Google Analytics integration limitations
The standard Zapier and Google Analytics integration works, but it has some obvious limitations:
- When you're using Google Analytics as a "trigger," you can only check the Goal is happening. You can't check Event, pageview, or any other metric that might be relevant to you
- When you're using Google Analytics as an "action," you can only Run a Report, Create a Measurement, or Update Goal
If that's enough for you, please continue reading the 1st method of connecting Google Analytics and Zapier. If you find this limiting, jump right to the 2nd method.
Create a new Google Analytics Zap
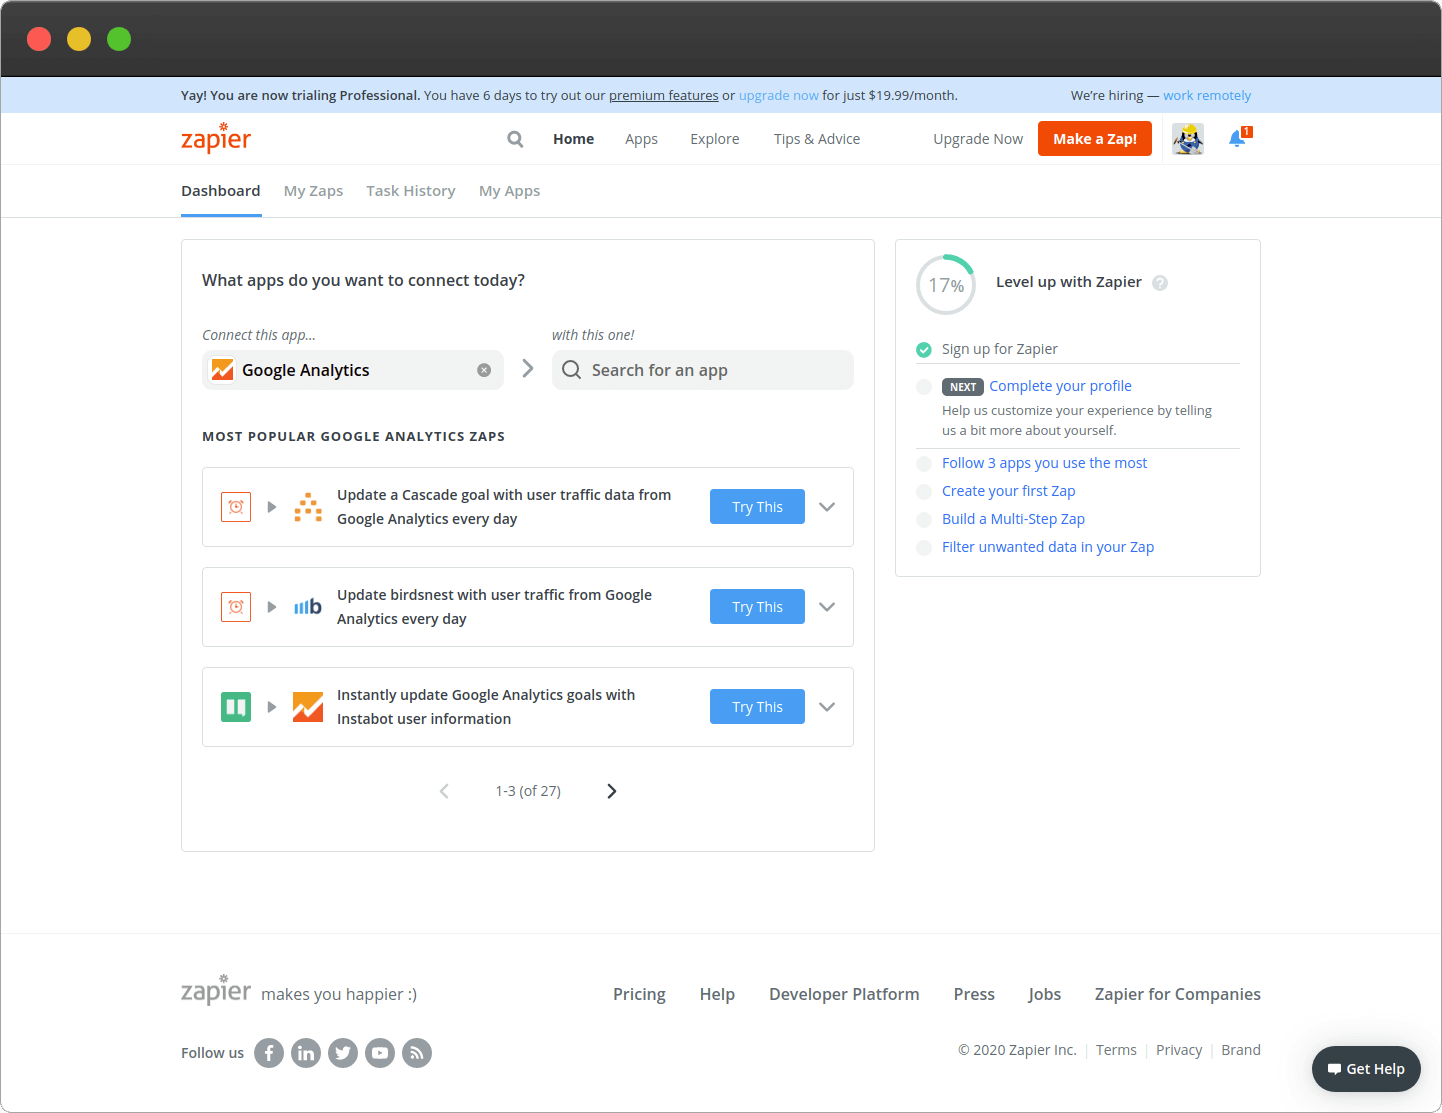
Creating a zap is straightforward. As an example, let's connect Google Analytics with Google Sheets.
On the left side, choose Google Analytics:
On the right side, choose Google Sheets:
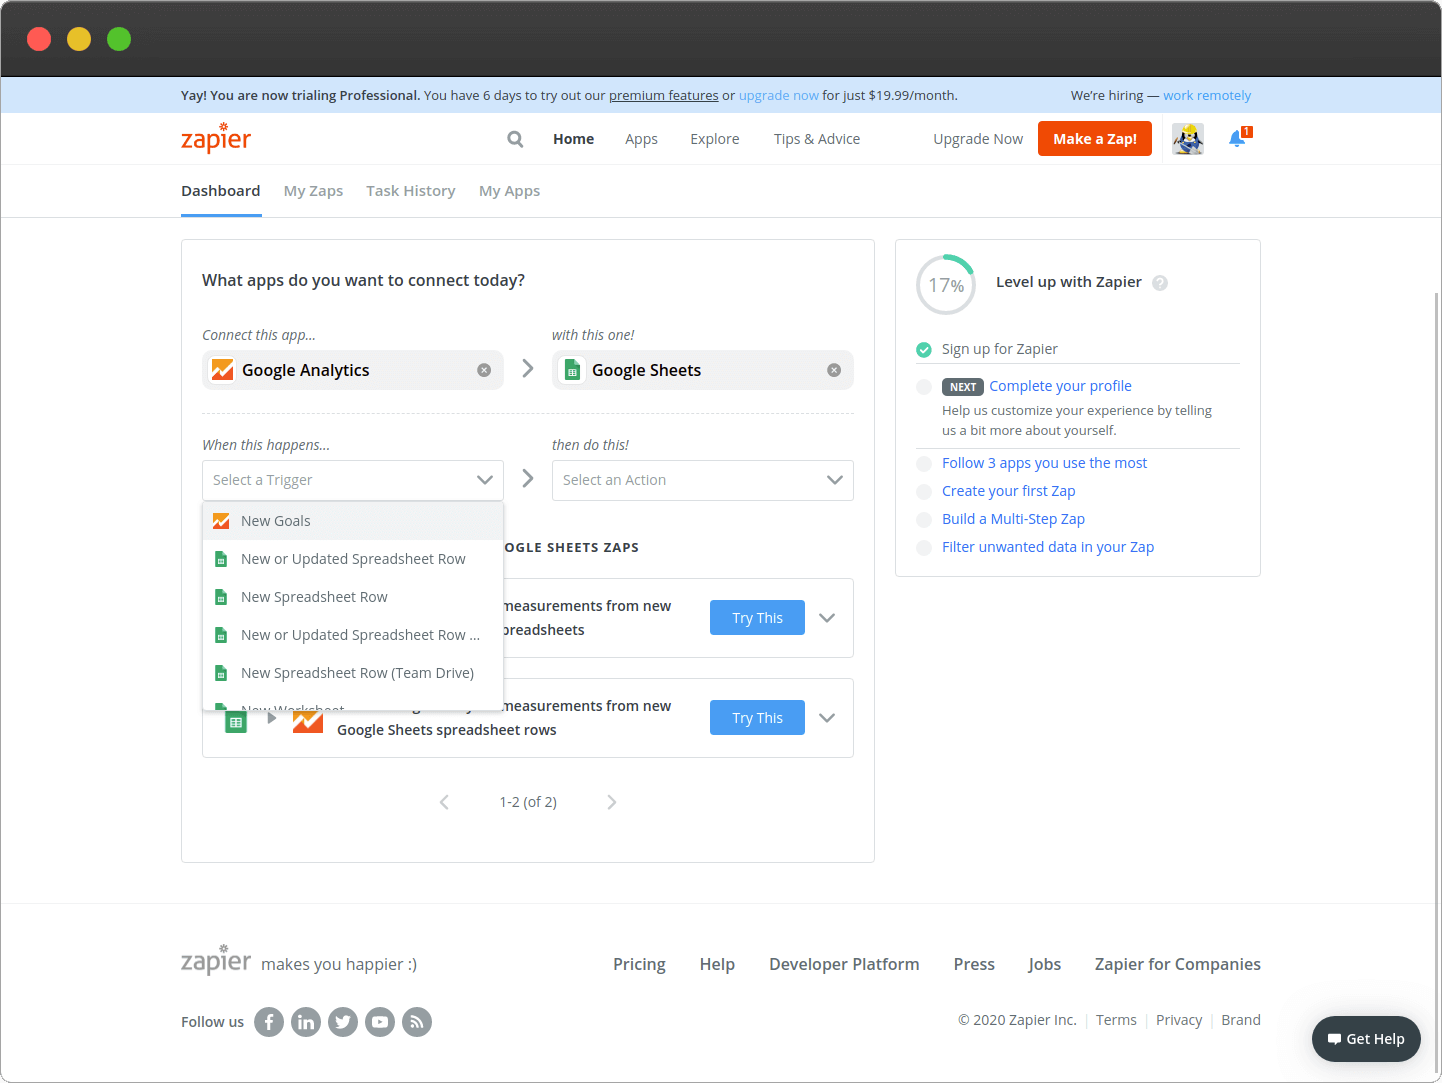
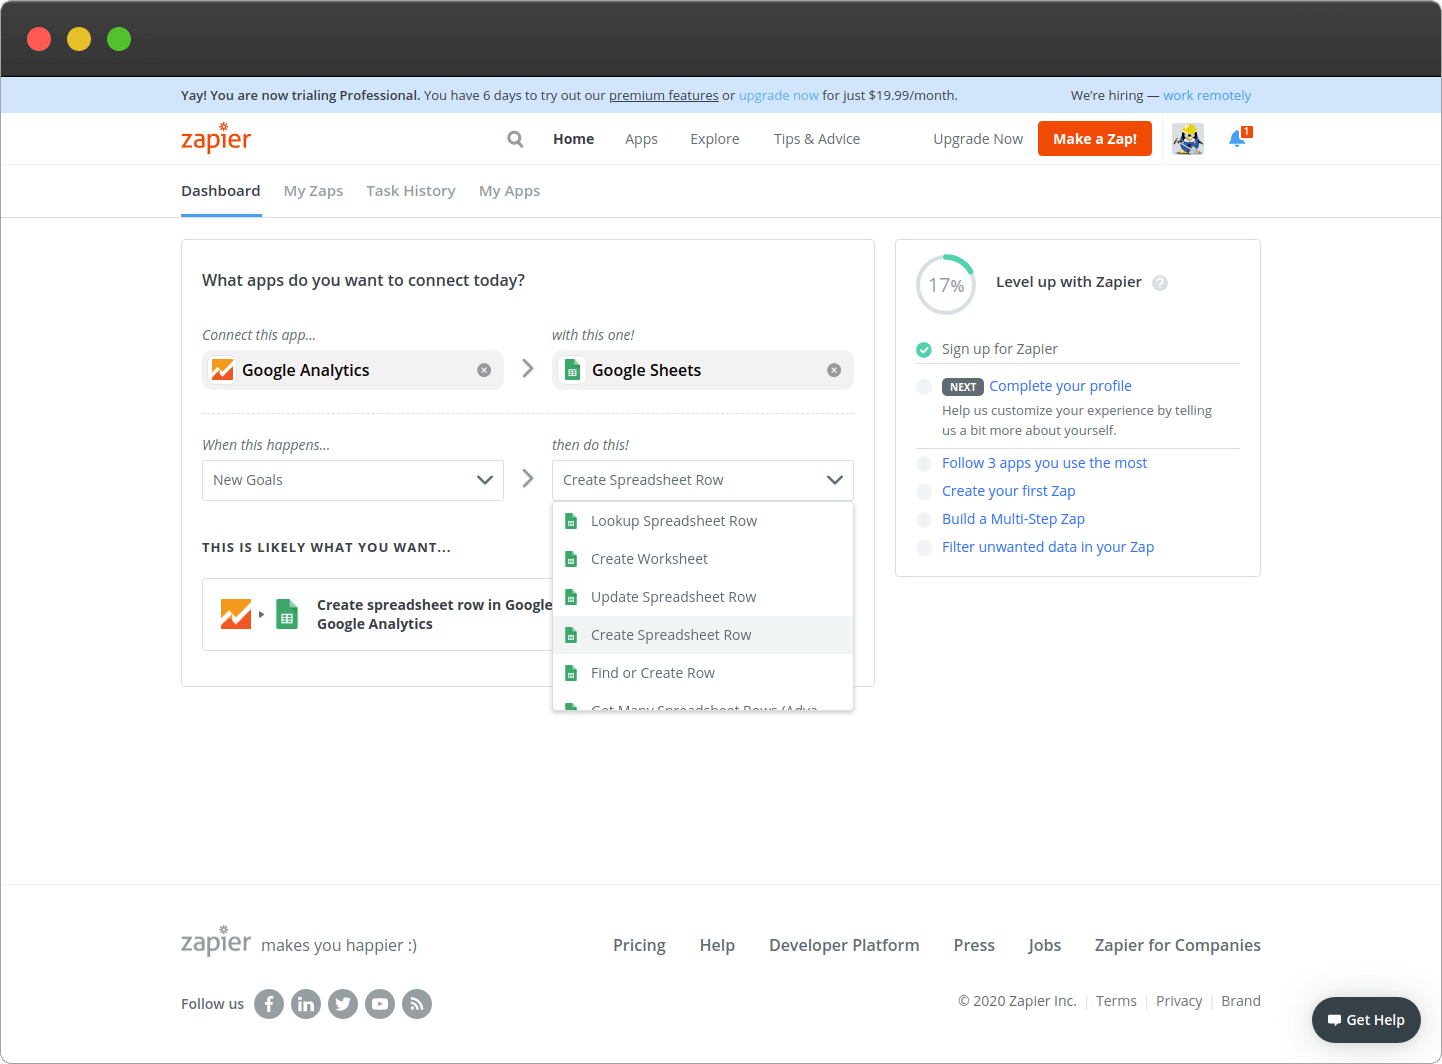
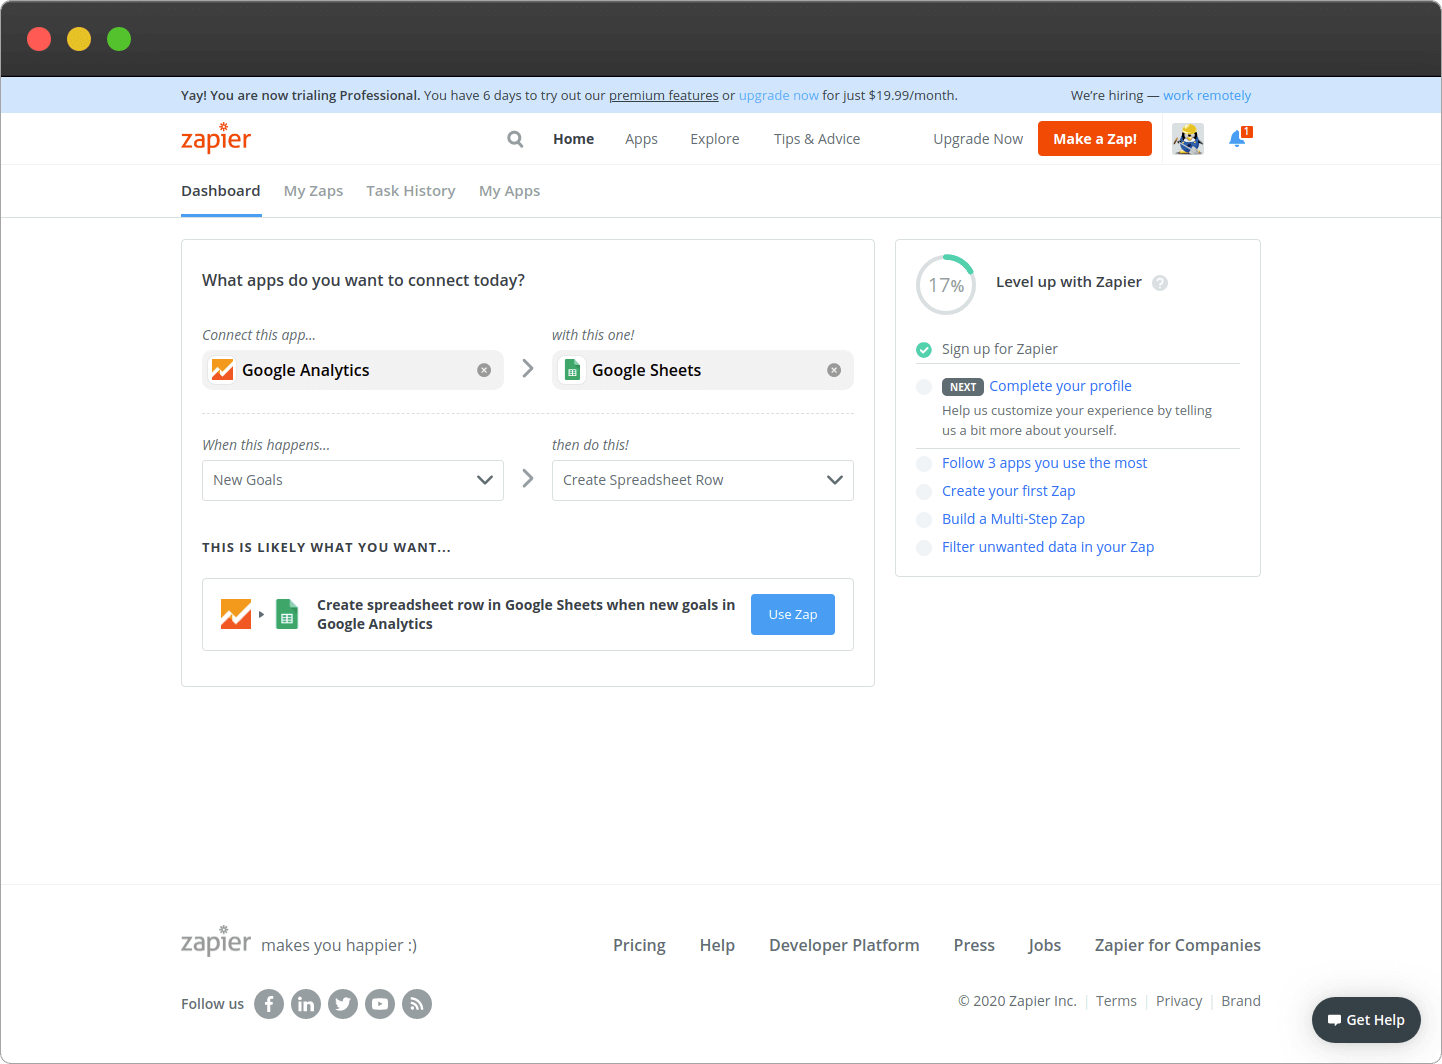
Then, on the next row, choose "When this happens" - "New Goals," and "Then do this" - "Create Spreadsheet Row" respectively:
Finally, click the blue "Use Zap" button:
You'll get to the zap modification screen. Click the blue "Sign in to Google Analytics" button, then sign in to Google:
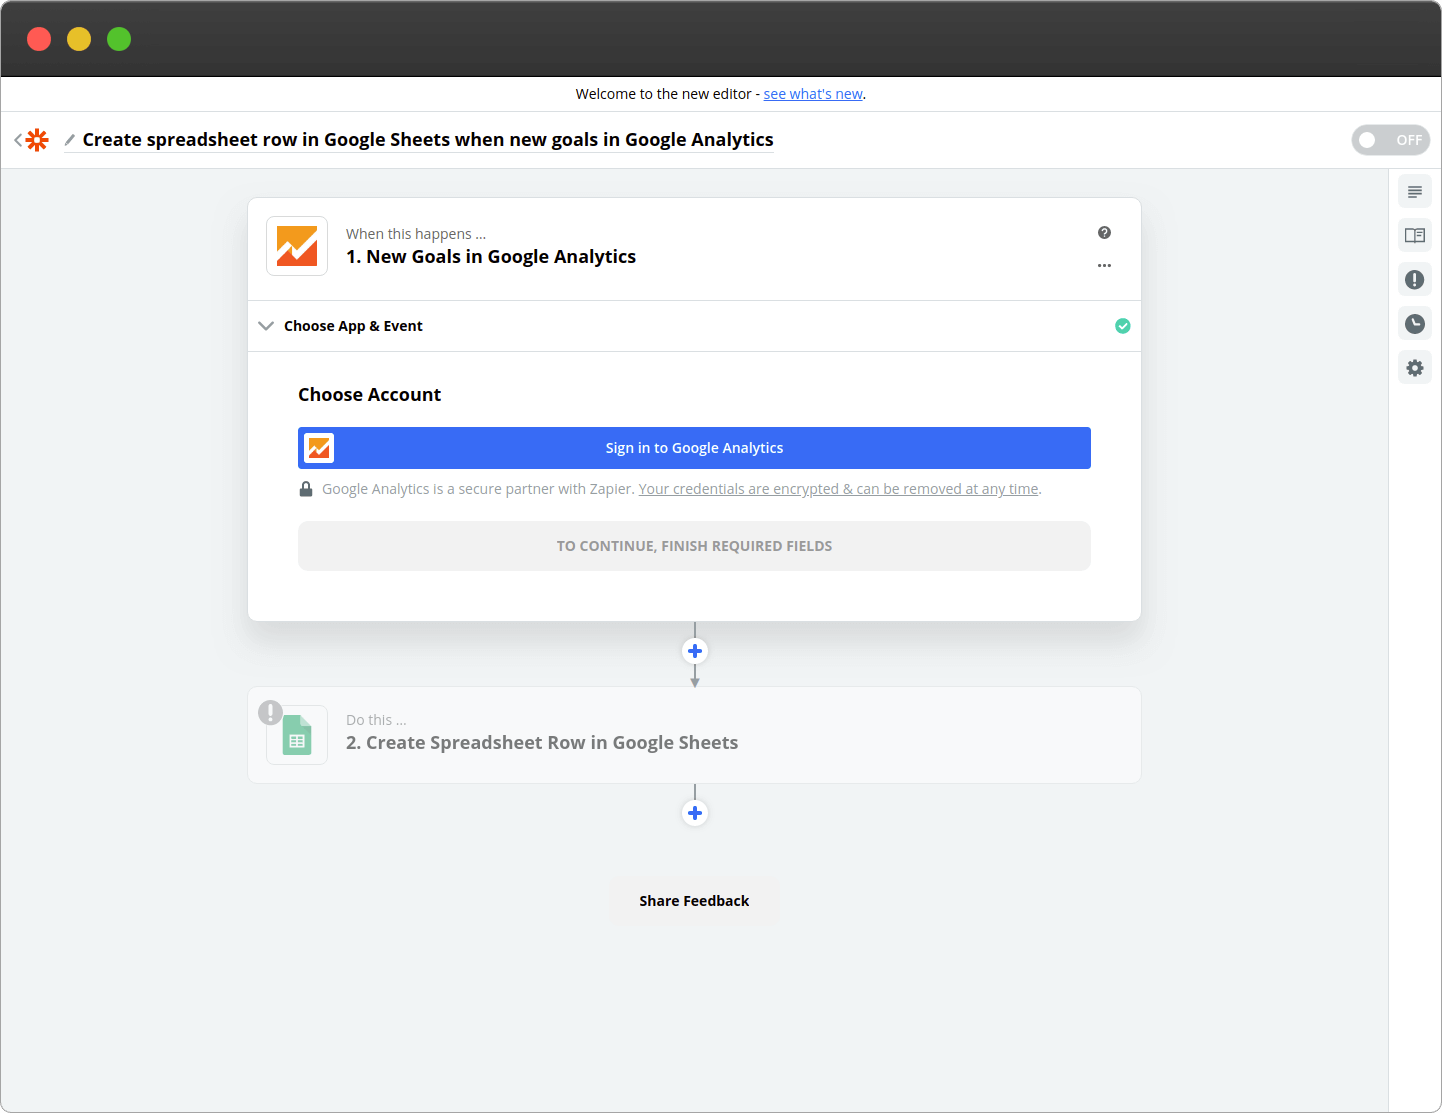
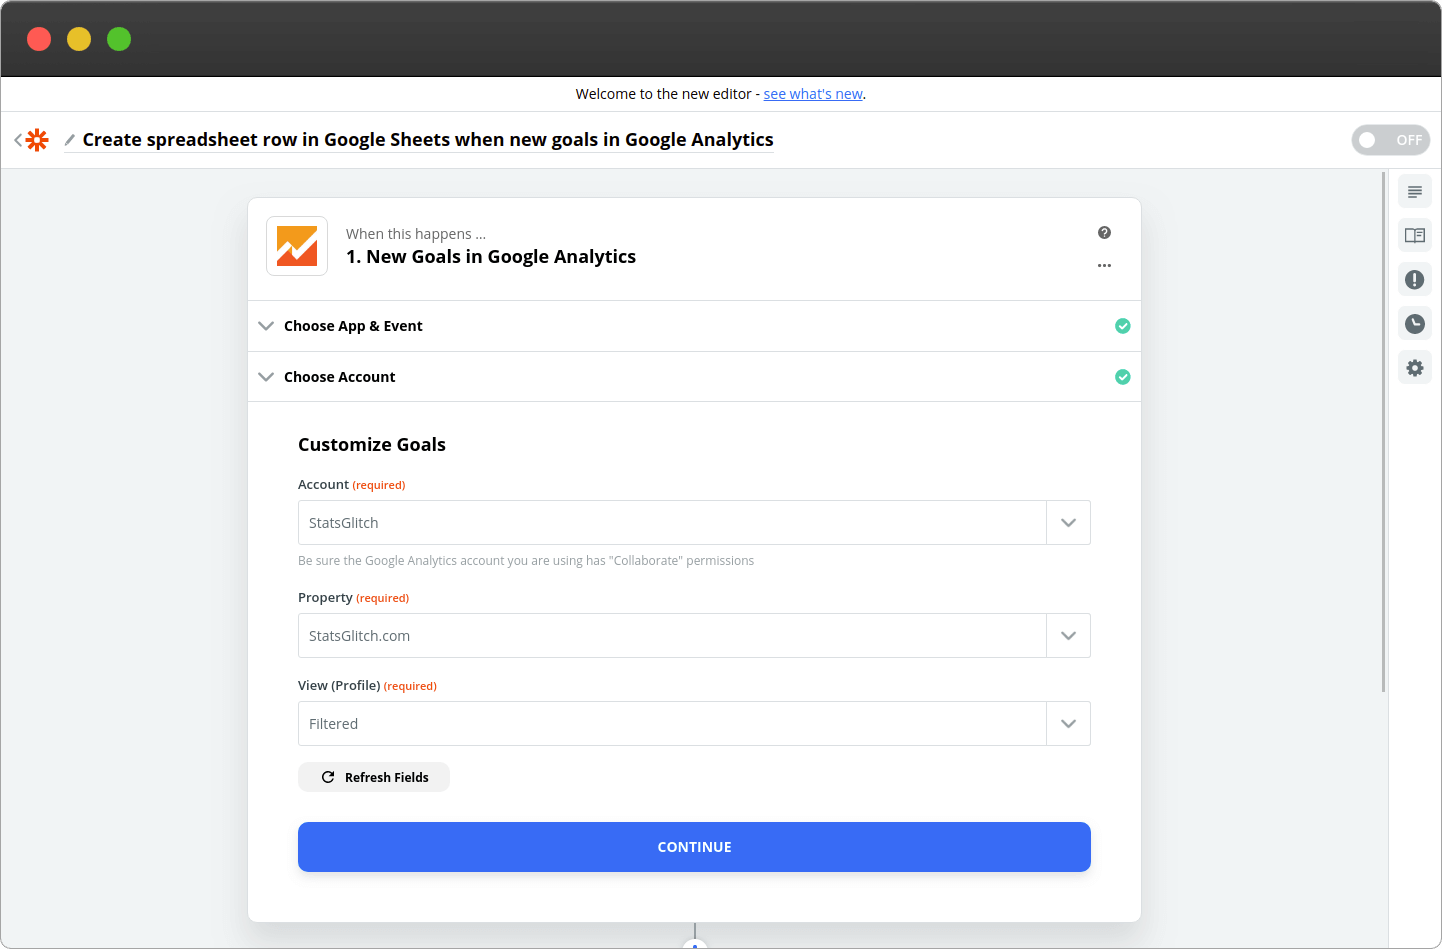
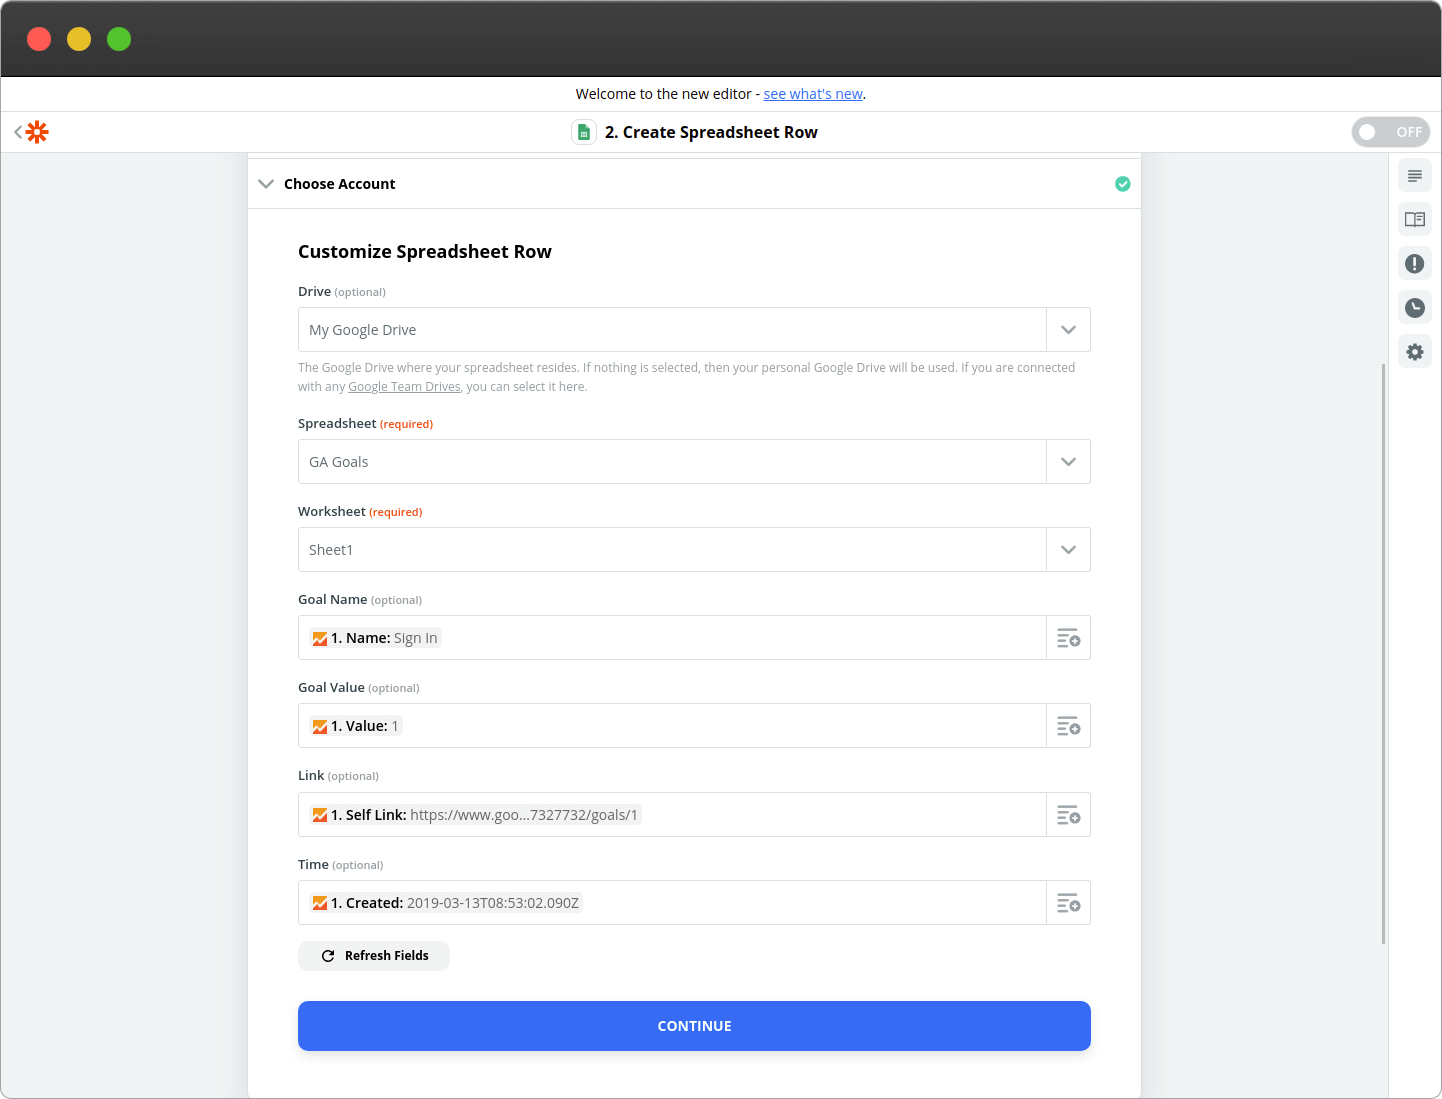
Choose that spreadsheet on the zapier form, fill in the required fields, click the "Continue" button, then "Test & Continue":
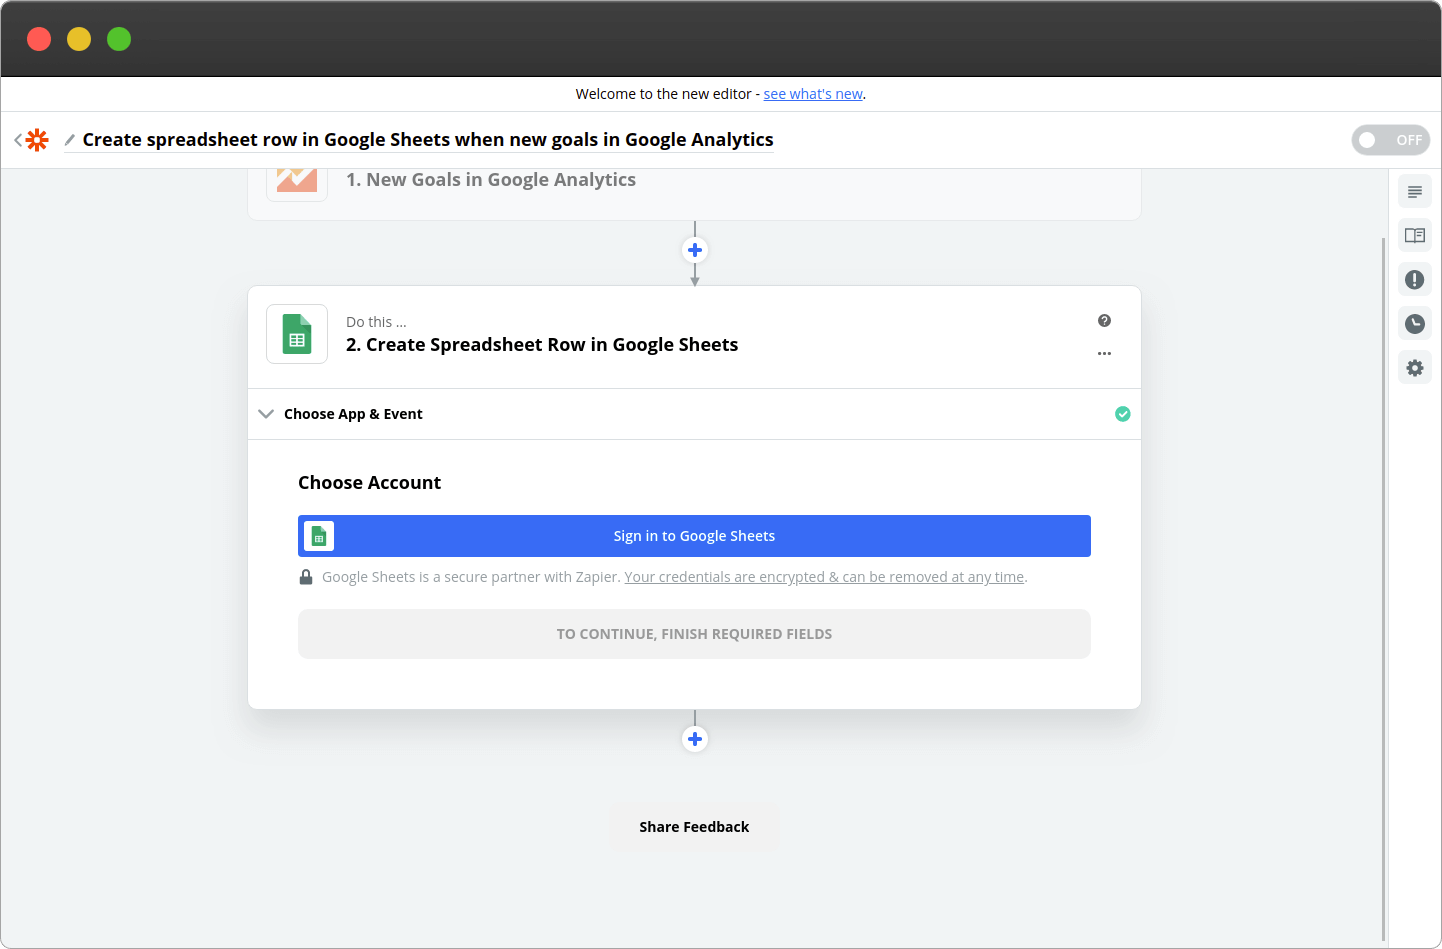
If all goes well, you'll arrive at the 2nd part of the setup, and you will now have to sign in to Google Sheets. Click the blue "Sign in to Google Sheets" button:
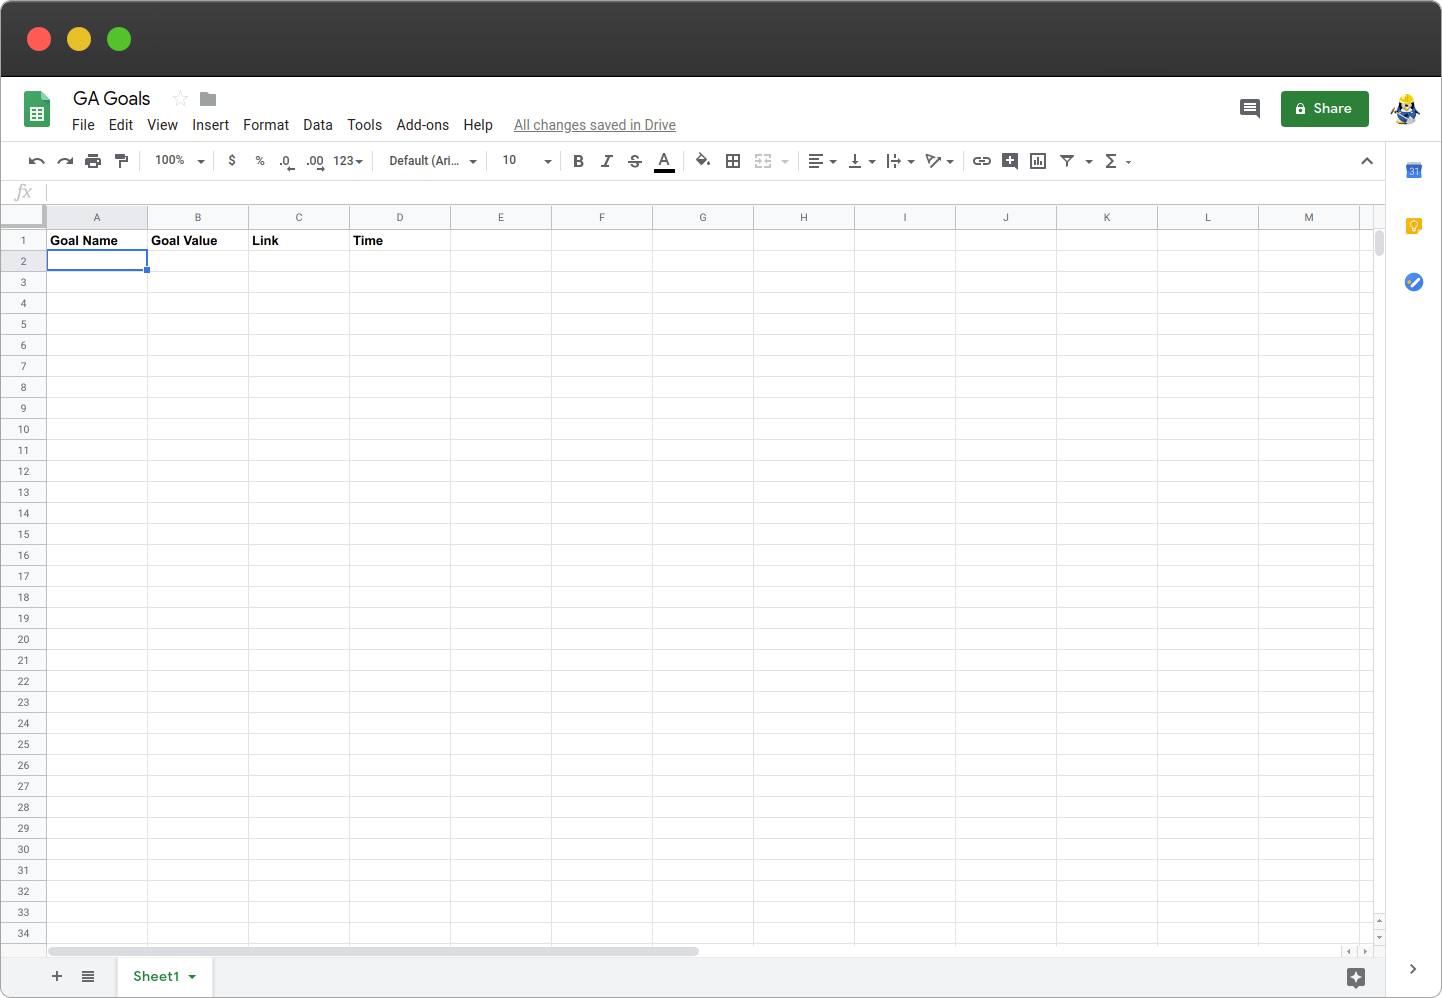
Create a sheet on the new tab (it is as easy as clicking https://sheets.new), the first row is a header row with column names:
Choose that spreadsheet on the zapier form, fill the needed fields, click the "continue" button, then "test & continue":
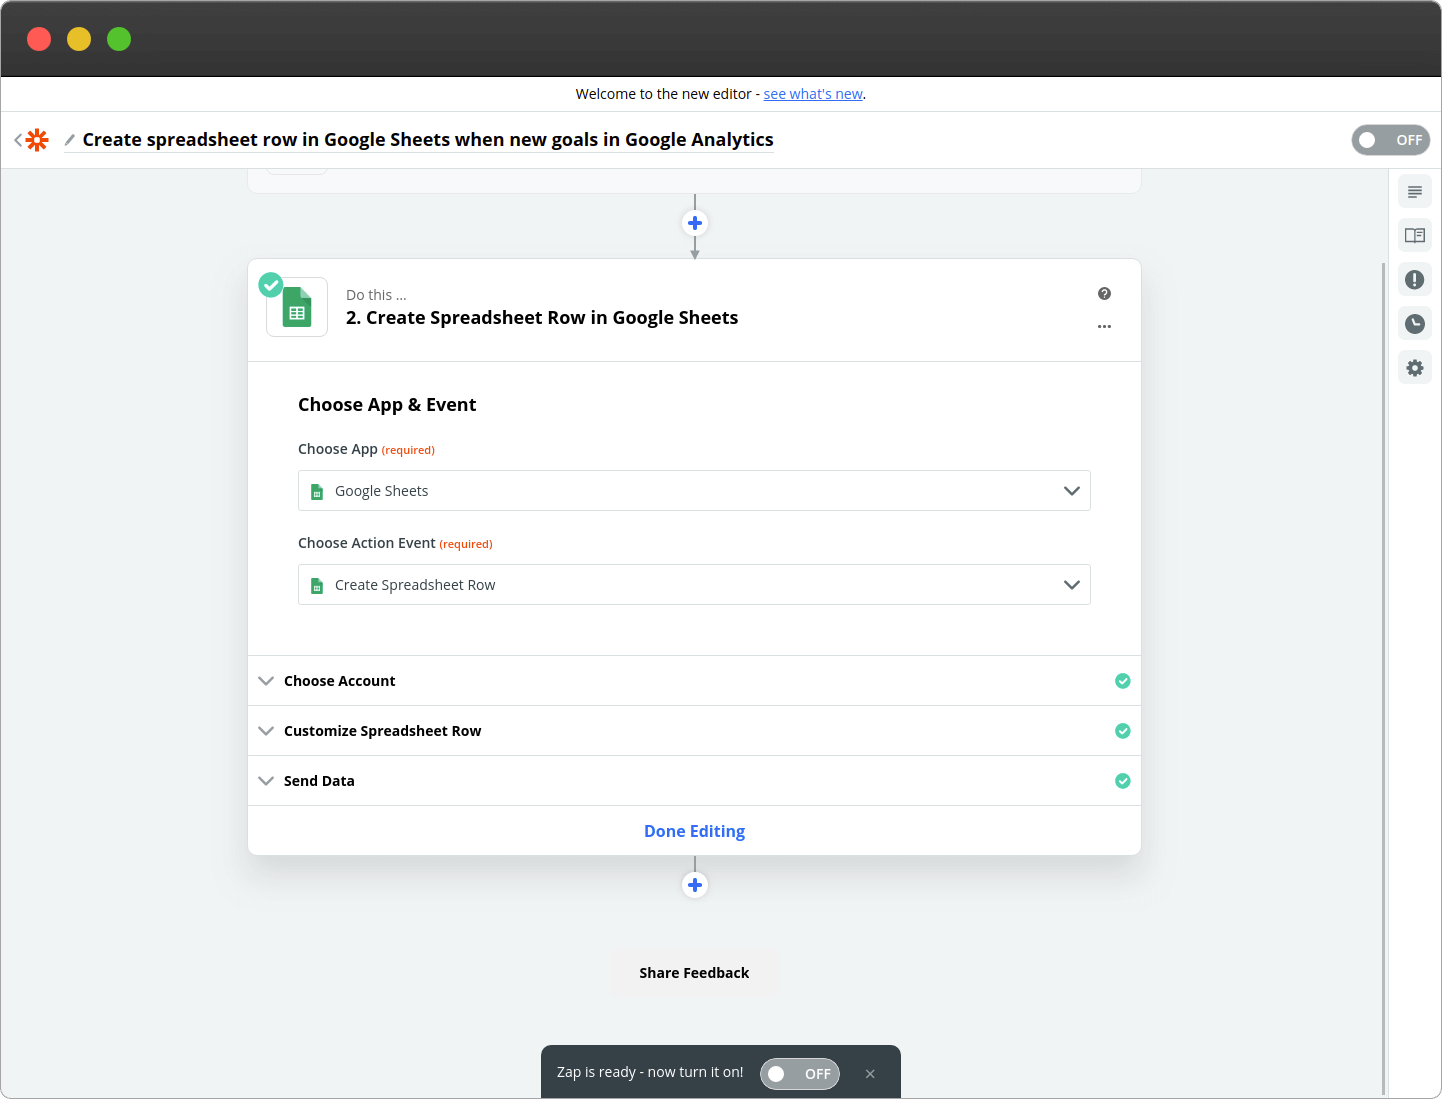
Finally, click the "Done Editing" button and then turn the Zap on using the toggle at the bottom of the screen:
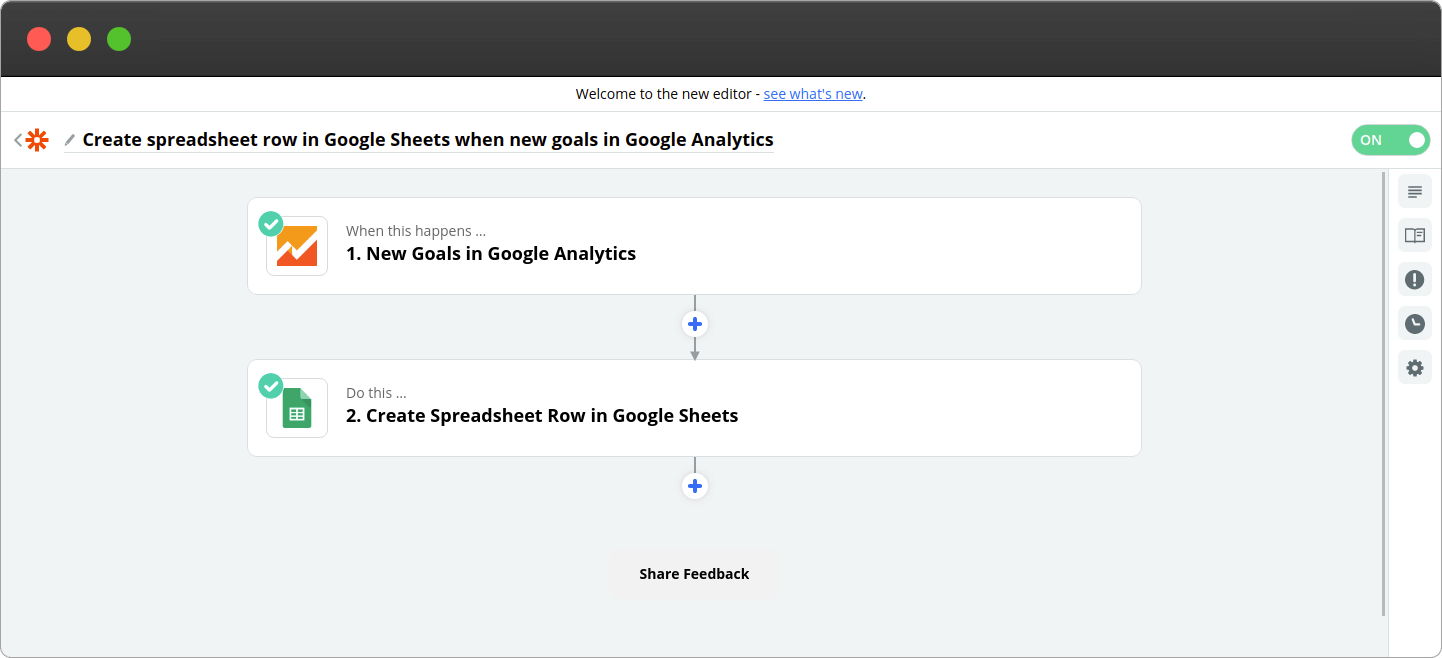
After a few seconds, you should see the bottom right toggle turn to green:
Modify or turn off your Zap
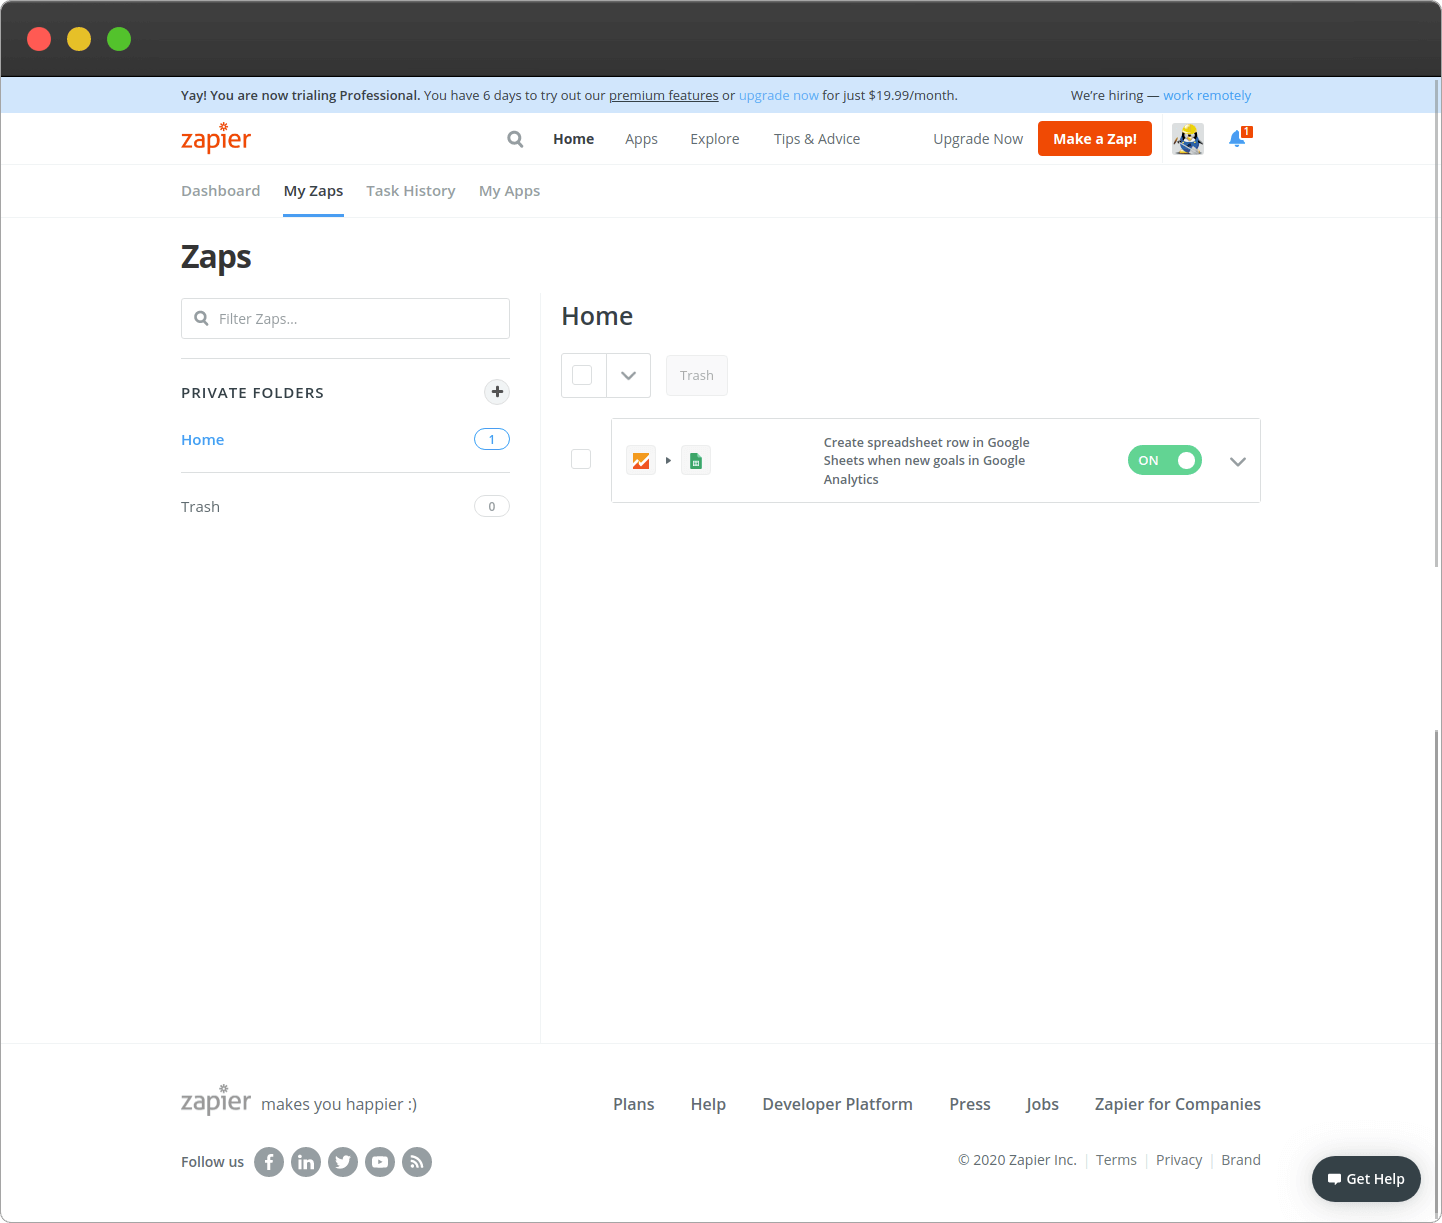
You can see all your zaps on https://zapier.com/app/zaps, click on the zap name to edit it, and you can use the toggle to turn it quickly on or off:
When modifying a zap, use the previous instructions to change the Google Analytics Account or different spreadsheets.
5 examples of Google Analytics Zapier integration
Besides the previously mentioned Google Analytics Goal -> Google Sheets example, here are 5 more possible use cases:
- Google Forms response -> Google Analytics Measurement: Create Google Analytics Measurements from new responses on Google Forms
- Stripe Charge -> Google Analytics Measurement: Create Google Analytics measurements from new Stripe charges
- Google Analytics Goal -> HubSpot new Engagement: Create HubSpot engagement when Google Analytics goal is detected
- Google Analytics Goal -> Intercom add Note: Add note on Intercom when Google Analytics goal is detected
- Facebook Ads Lead -> Google Analytics Measurement: Create Google Analytics measurements from new Facebook Ads leads
As you see, the use cases are quite limited, and if you want to have more advanced integration, continue reading on to the next session.
Connect Google Analytics and Zapier (2nd method)
This method is a lot more powerful, as it allows you to trigger Zapier zaps upon almost any Google Analytics scenario. However, to use it, you need to register a StatsGlitch account.
Why it's a better way?
It provides a lot more flexibility, so you can utilize important Google Analytics metrics changes to trigger your Zaps. Here are some examples of Real-Time triggers:
- When you have a visitor on a specific page
- When you have more than X active users
- When you have users from your referral campaign or social network
- When you have sent an Event
- When you have a Goal with some value
- If you had no traffic to a specific page or all pages
- If you had visits from your referrals
- If you had visitors from a particular country/device
- If you had some Goals or Events
- If your Goals or Events had an unexpected spike or drop
Create a new Google Analytics + StatsGlitch Zap
The very first step is obviously to create a Zapier account. Check the register Zapier account section for more details.
Then, create a StatsGlitch account. Keep in mind that Zapier integration is an advanced feature and you need to have a business plan. After creating a StatsGlitch account, follow the instructions and connect your Google Analytics to StatsGlitch.
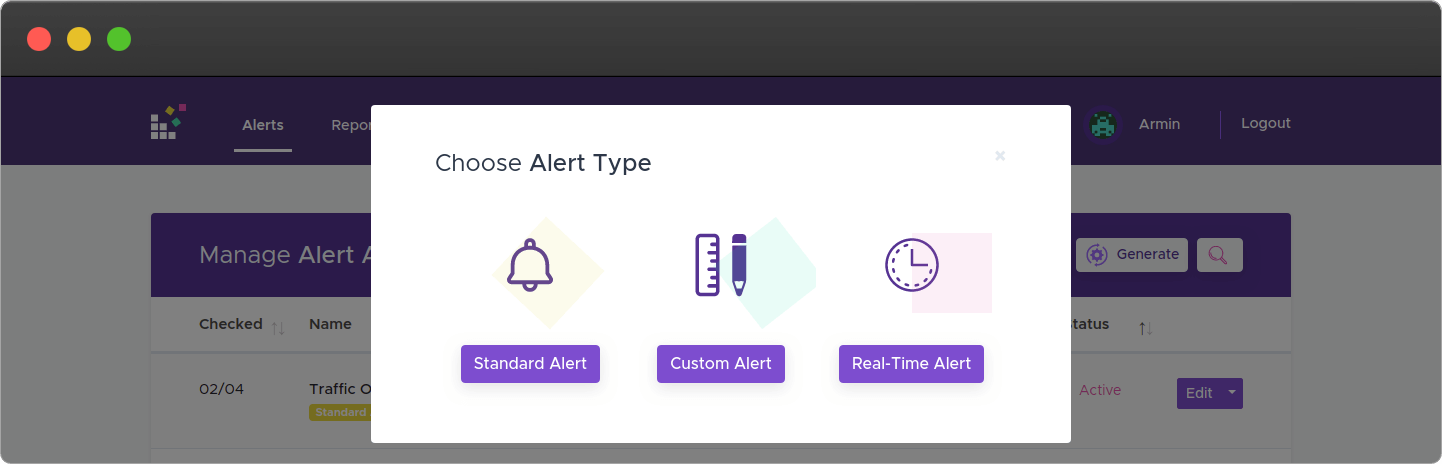
Next, let's create an alert when the user lands on a specific page. Head to Alerts, click on the "New Alert Agent" button, and choose "Real-Time Alert."
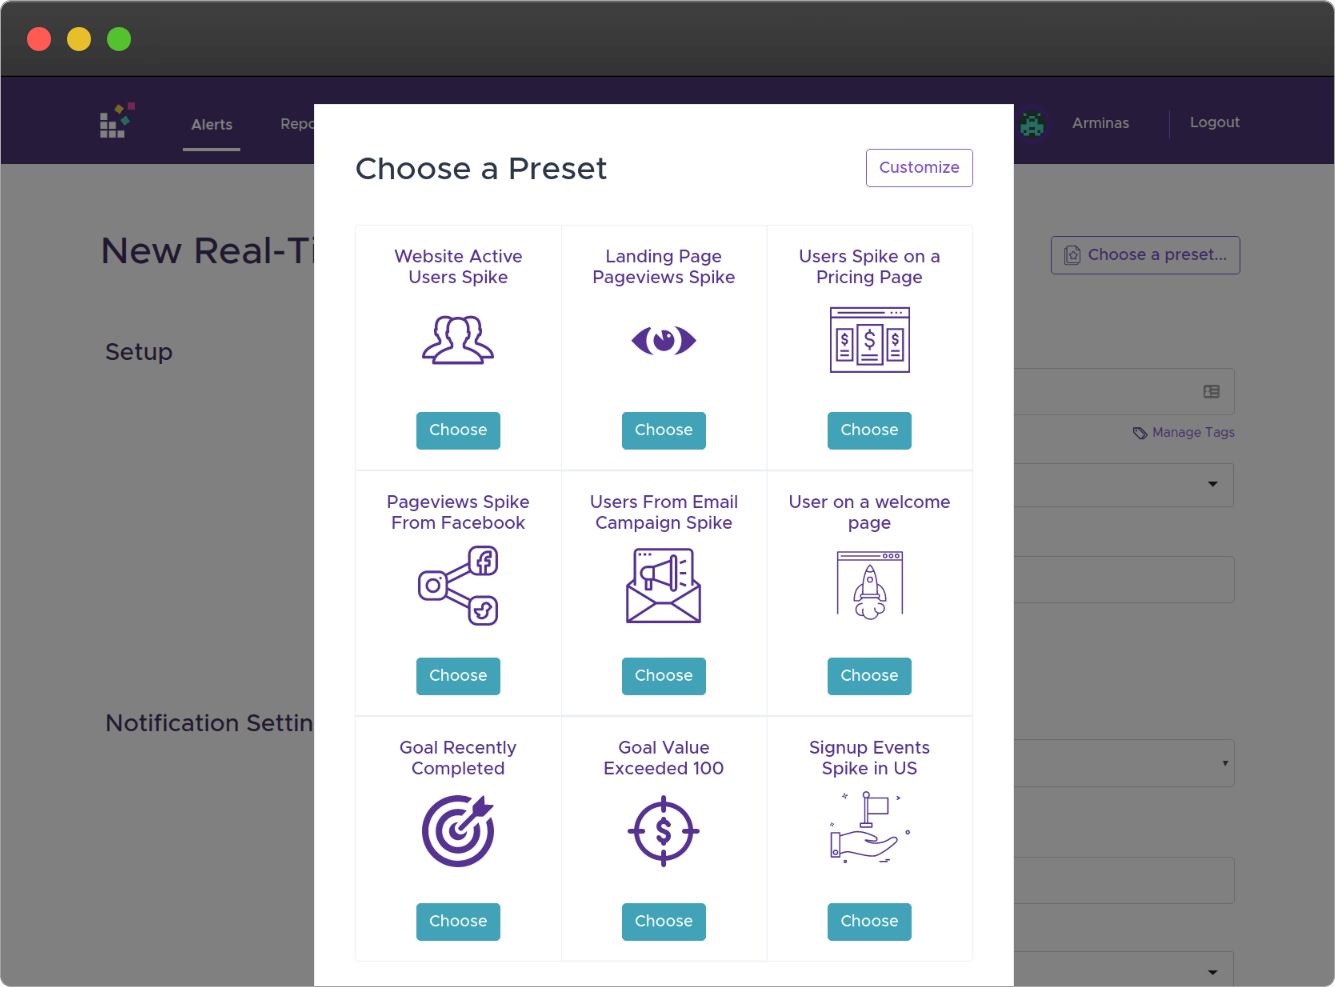
You'll land on a new alert agent creation form, and should see the "Choose a Preset" modal. Click "Users Spike on a Pricing Page" as a starting point:
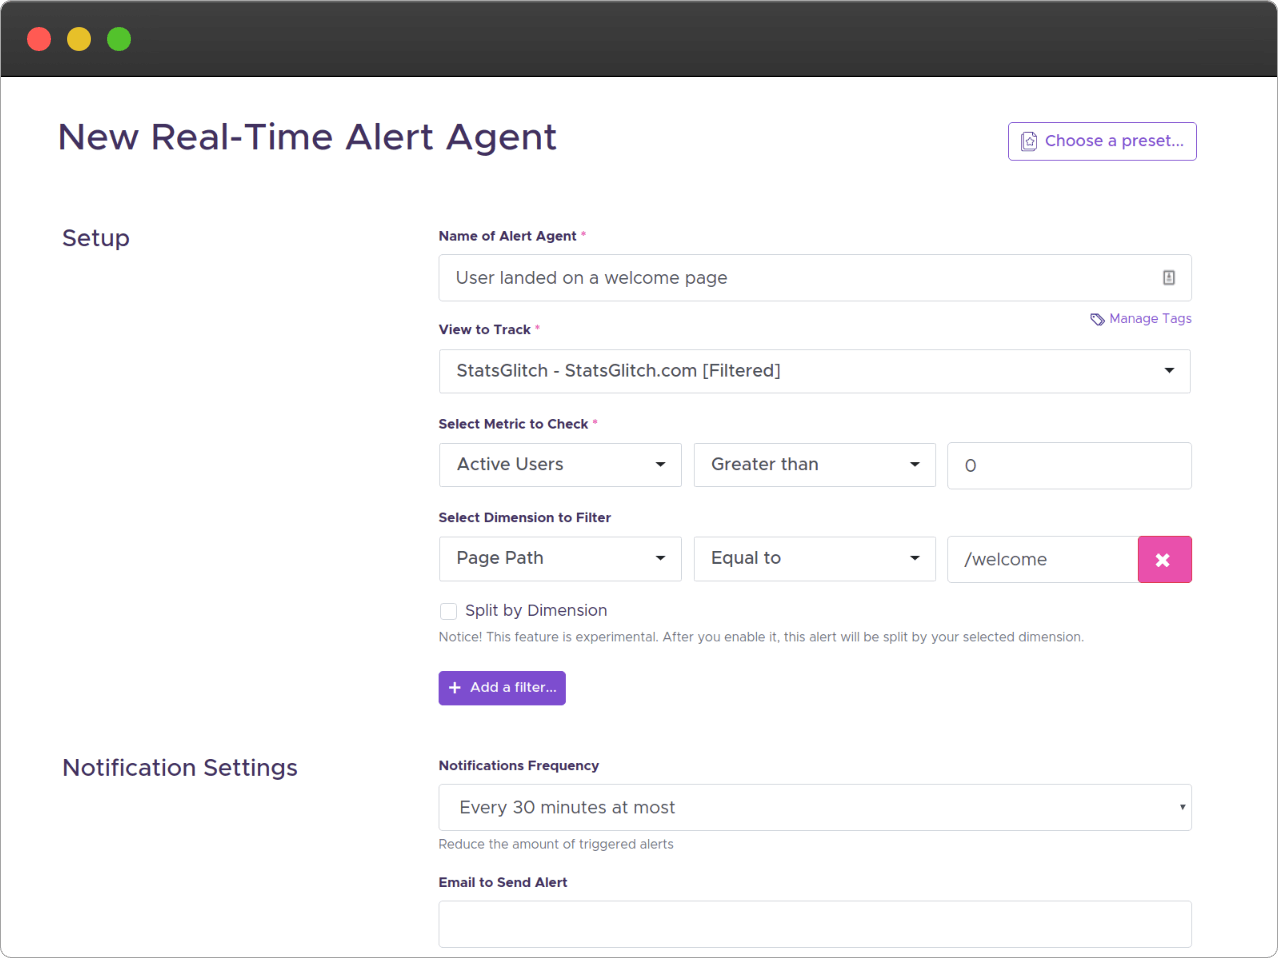
Rename your alert agent to "User landed on a welcome page," select Google Analytics view to track, set active users greater than 0, page path equal to /welcome (obviously, change the page path to your needs). Set the notification frequency to "Every 30 minutes at most," and leave empty "Email to Send Alert" if you wish to have only Zapier alerts:
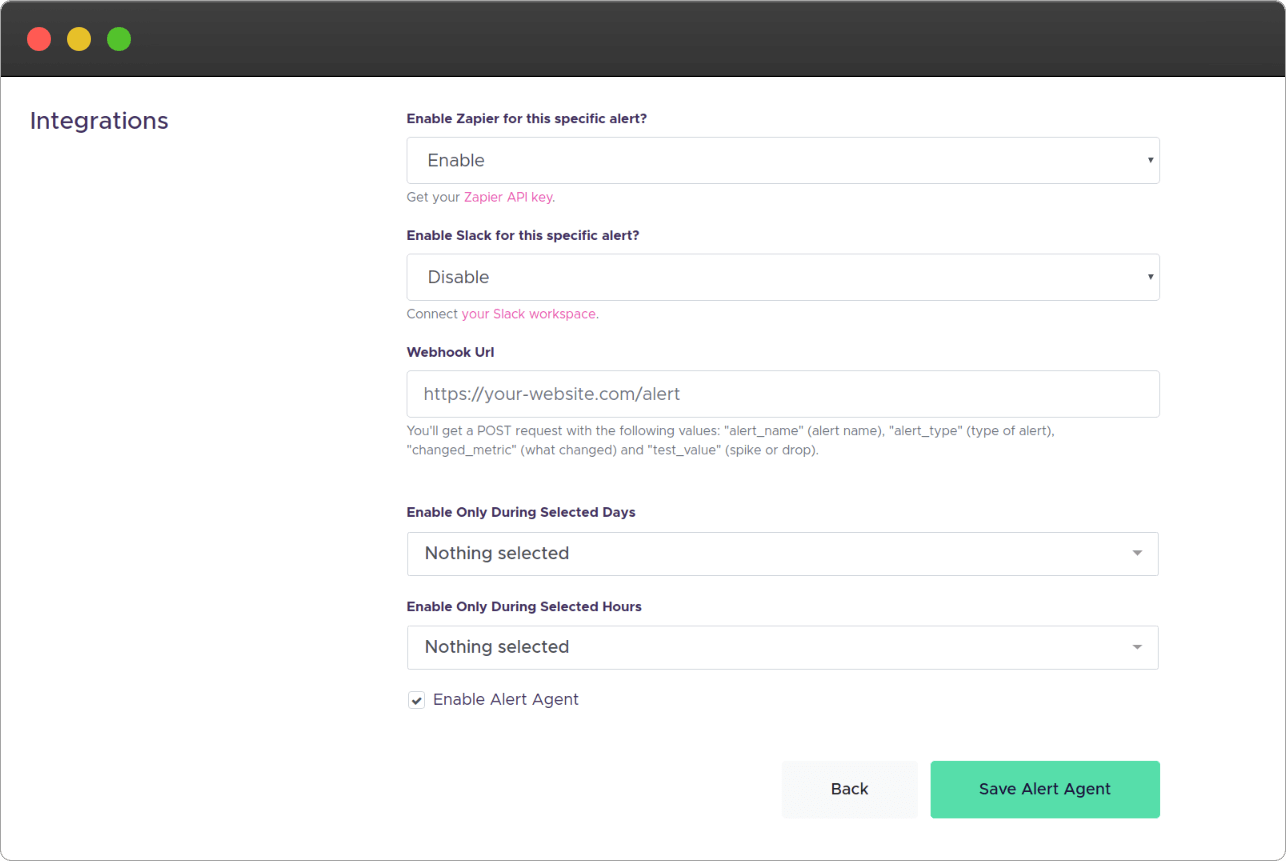
On the integrations section, enable Zapier. Optionally, you can enable an alert only during your workdays or selected hours. Finally, click the "Save Alert Agent" button on the form:
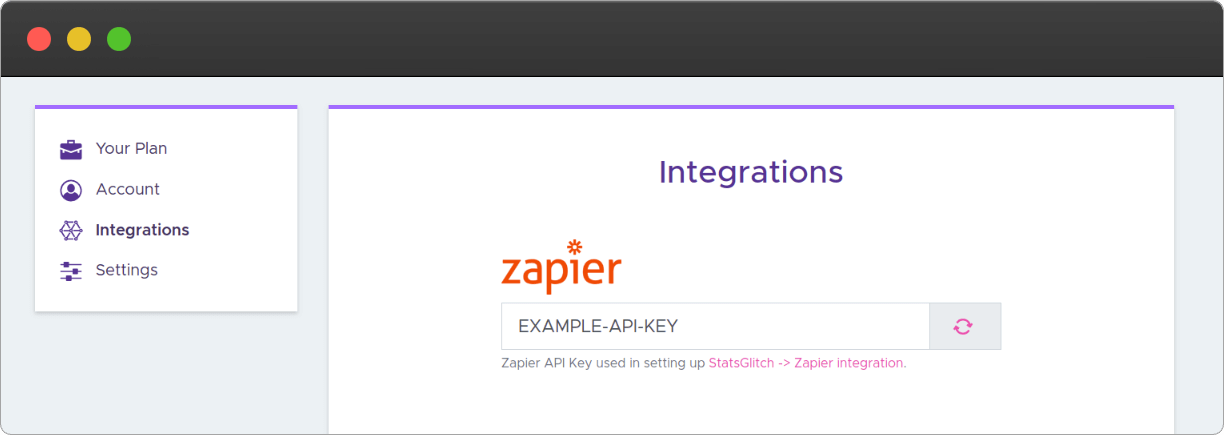
Open Integrations settings, then click on the link below your Zapier API key. You can also follow this link, but you'll need the Zapier API key either way:
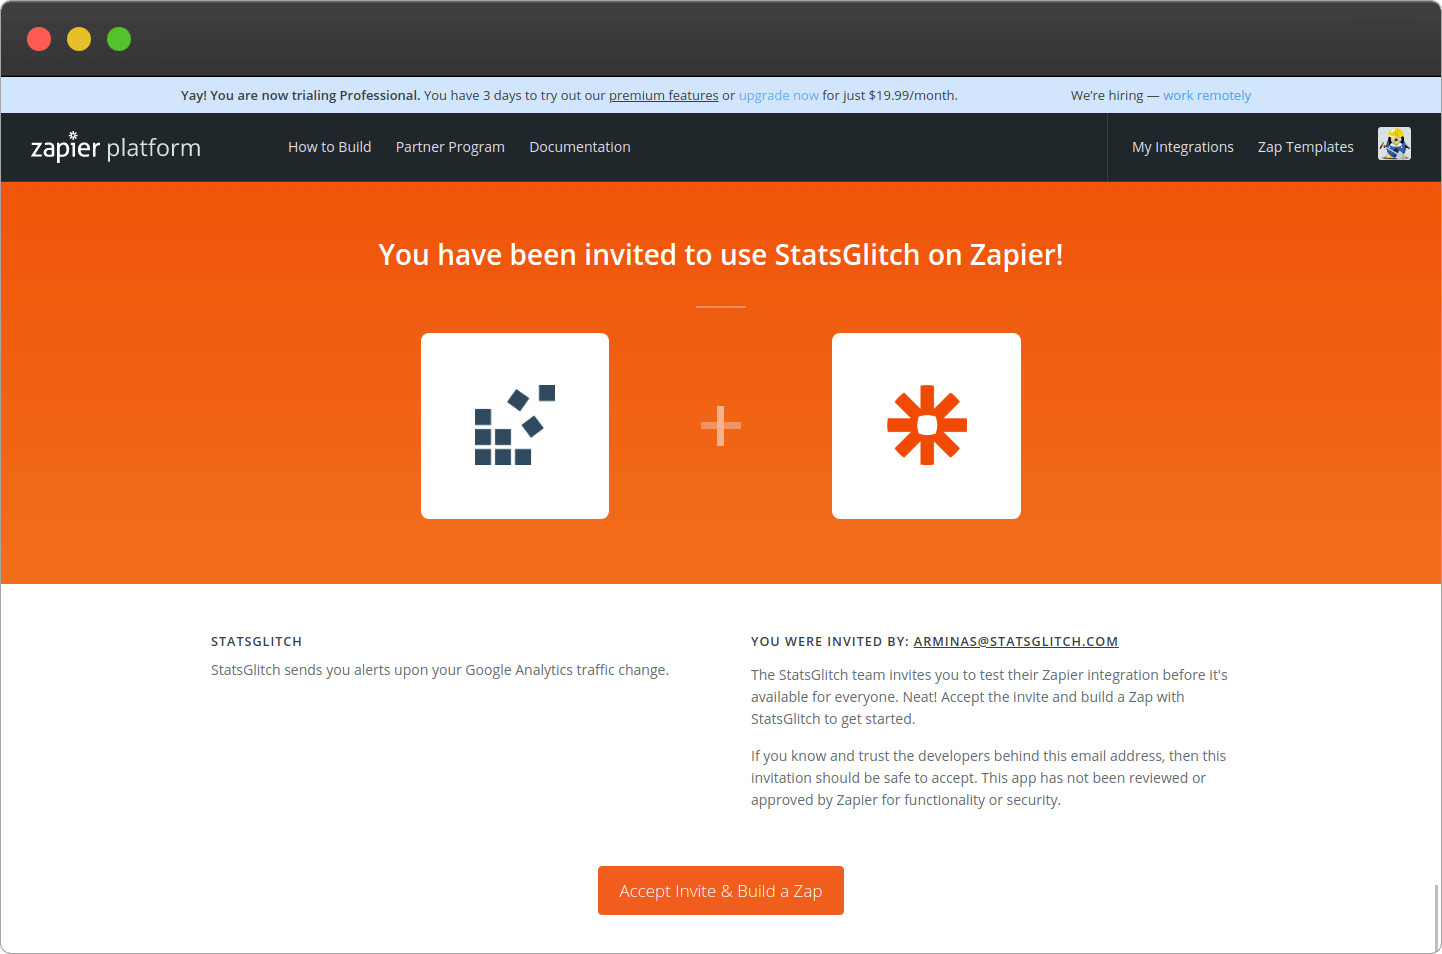
You'll land on a Zapier page, click the "Accept Invite & Build a Zap" button:
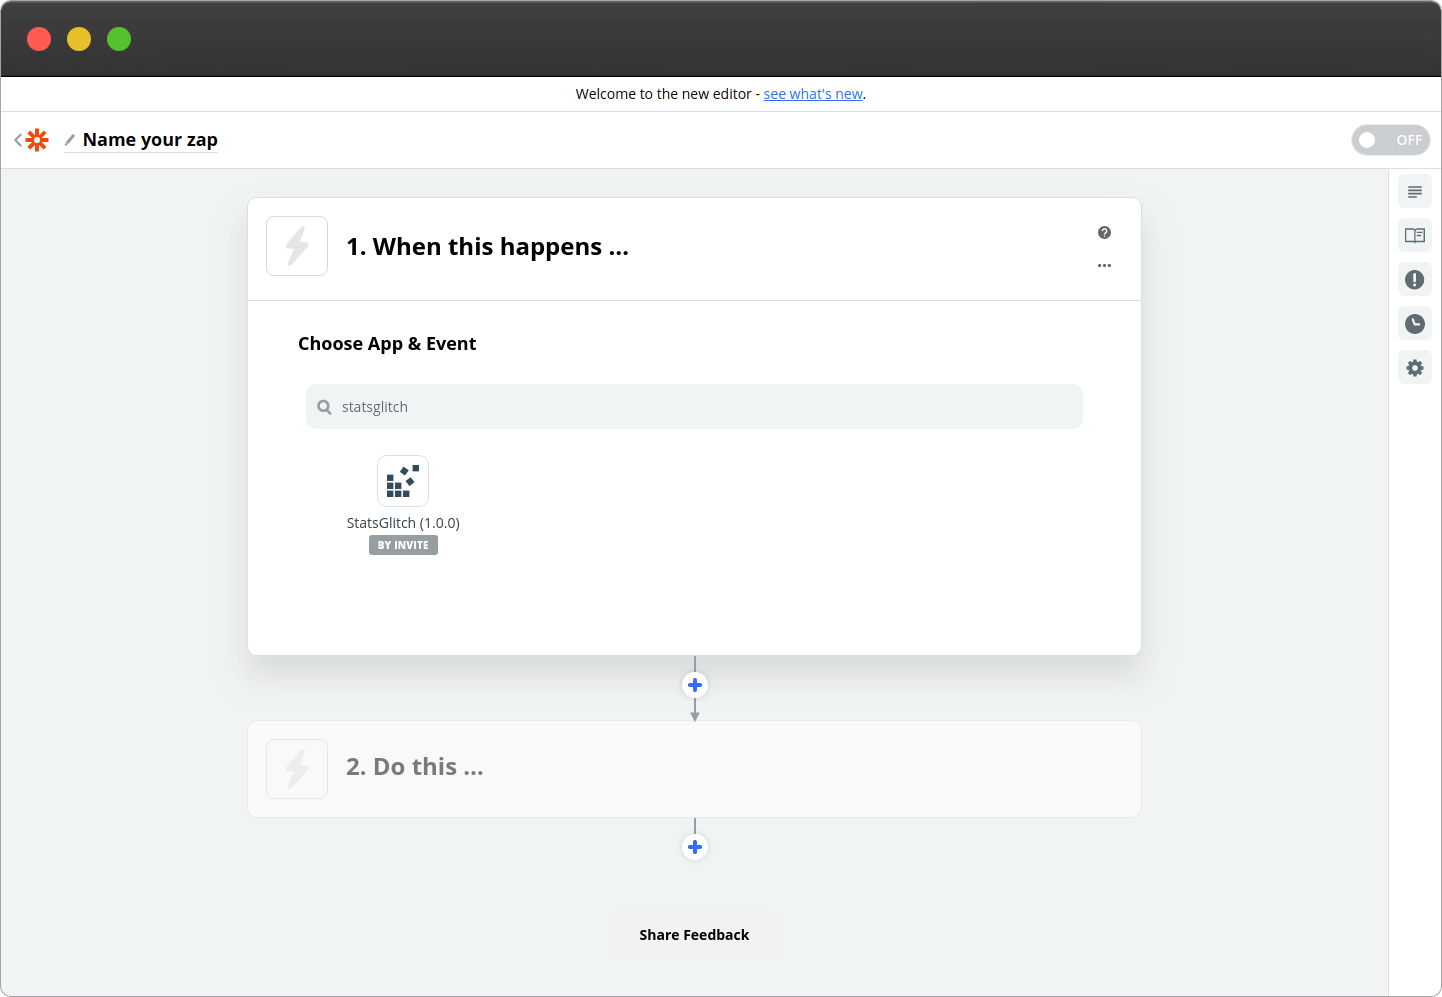
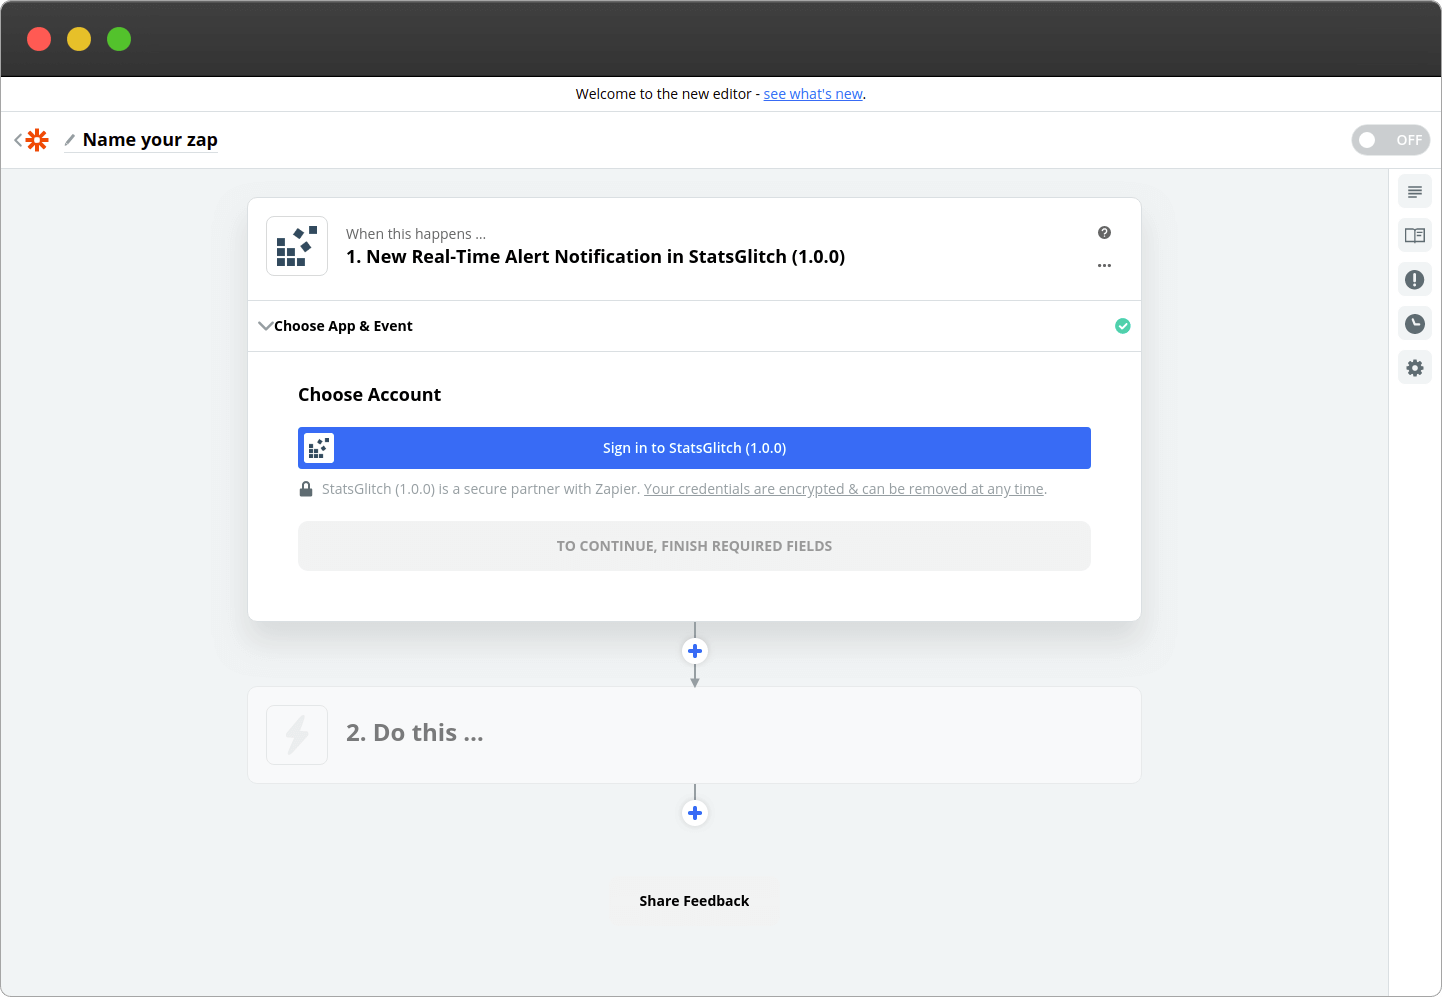
Click make a zap button and on "When this happens" search for "StatsGlitch", then click on the icon:
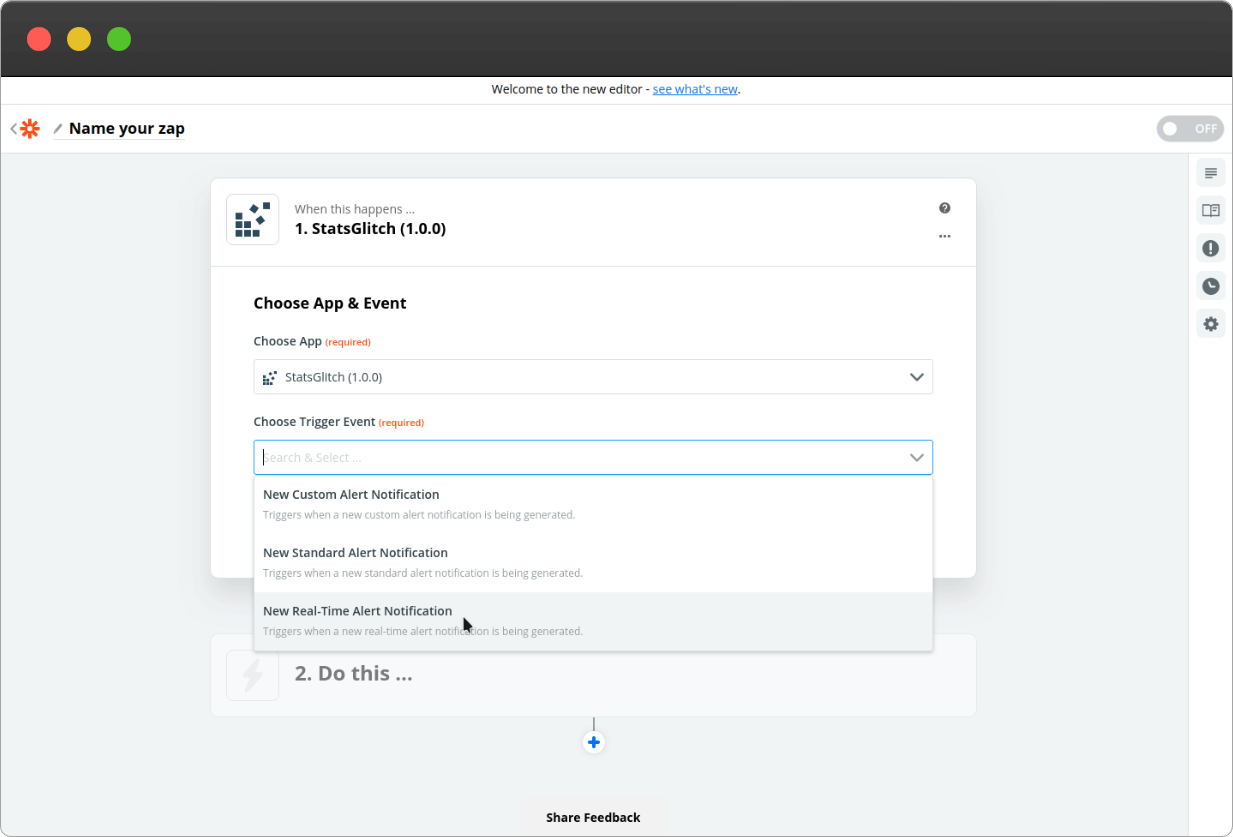
Click on the "Choose Trigger Event" dropdown and select "New Real-Time Alert Notification," then the "Continue" button:
Click the "Sign in to StatsGlitch" button, and a new window will pop up, enter the API key that you received on the Integrations settings page, then confirm it:
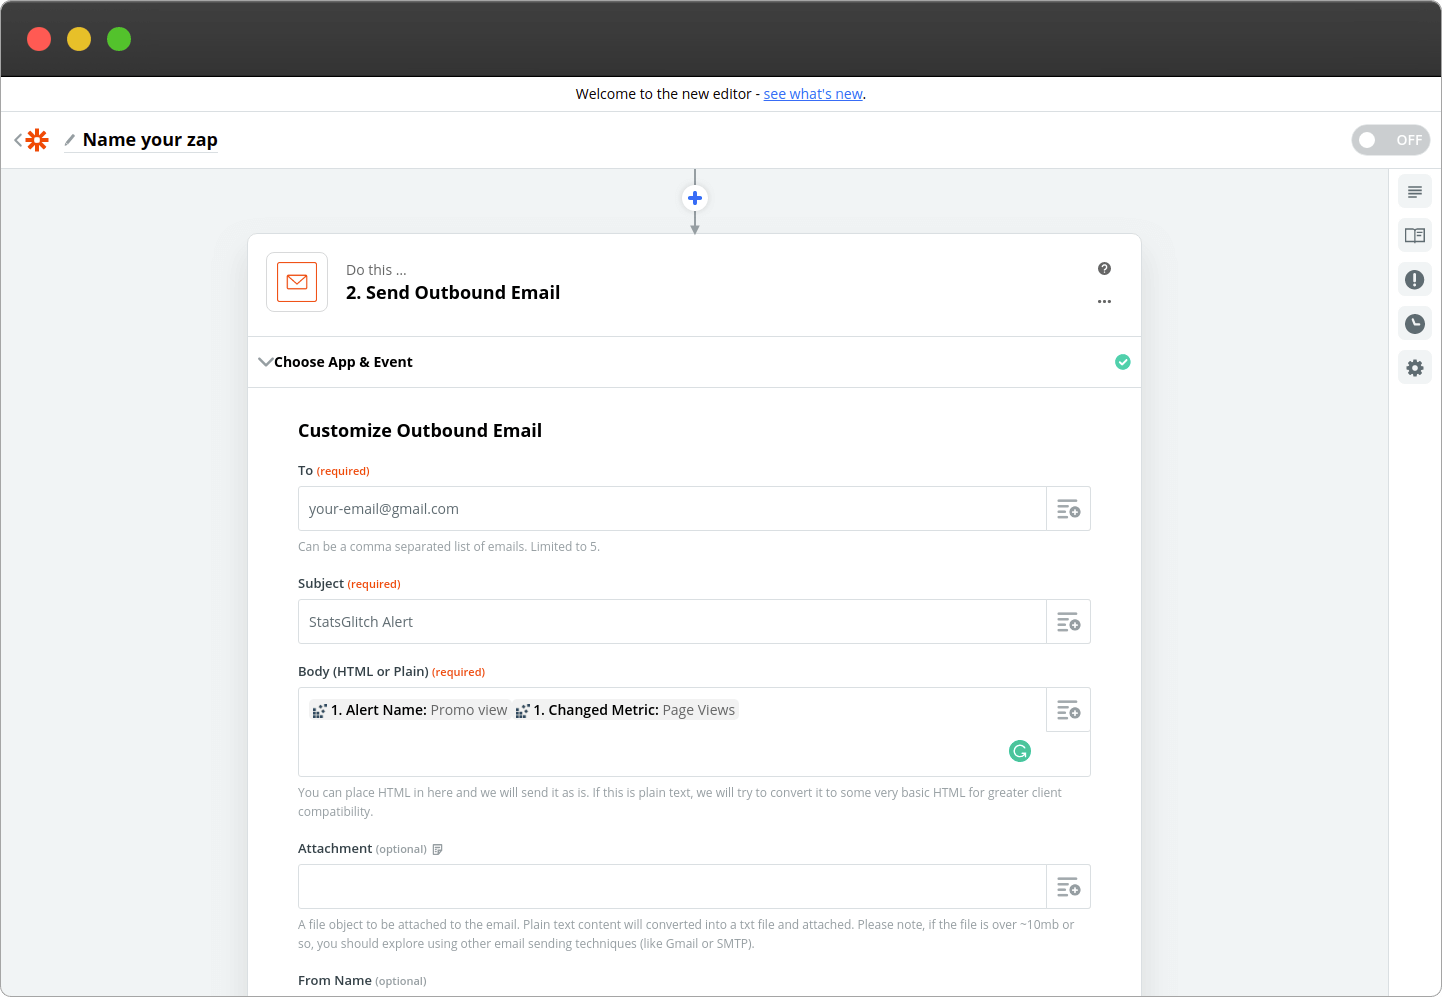
Choose your defined Alert Name (should be "User landed on a welcome page"), leave the changed metric empty. Then click "Continue":

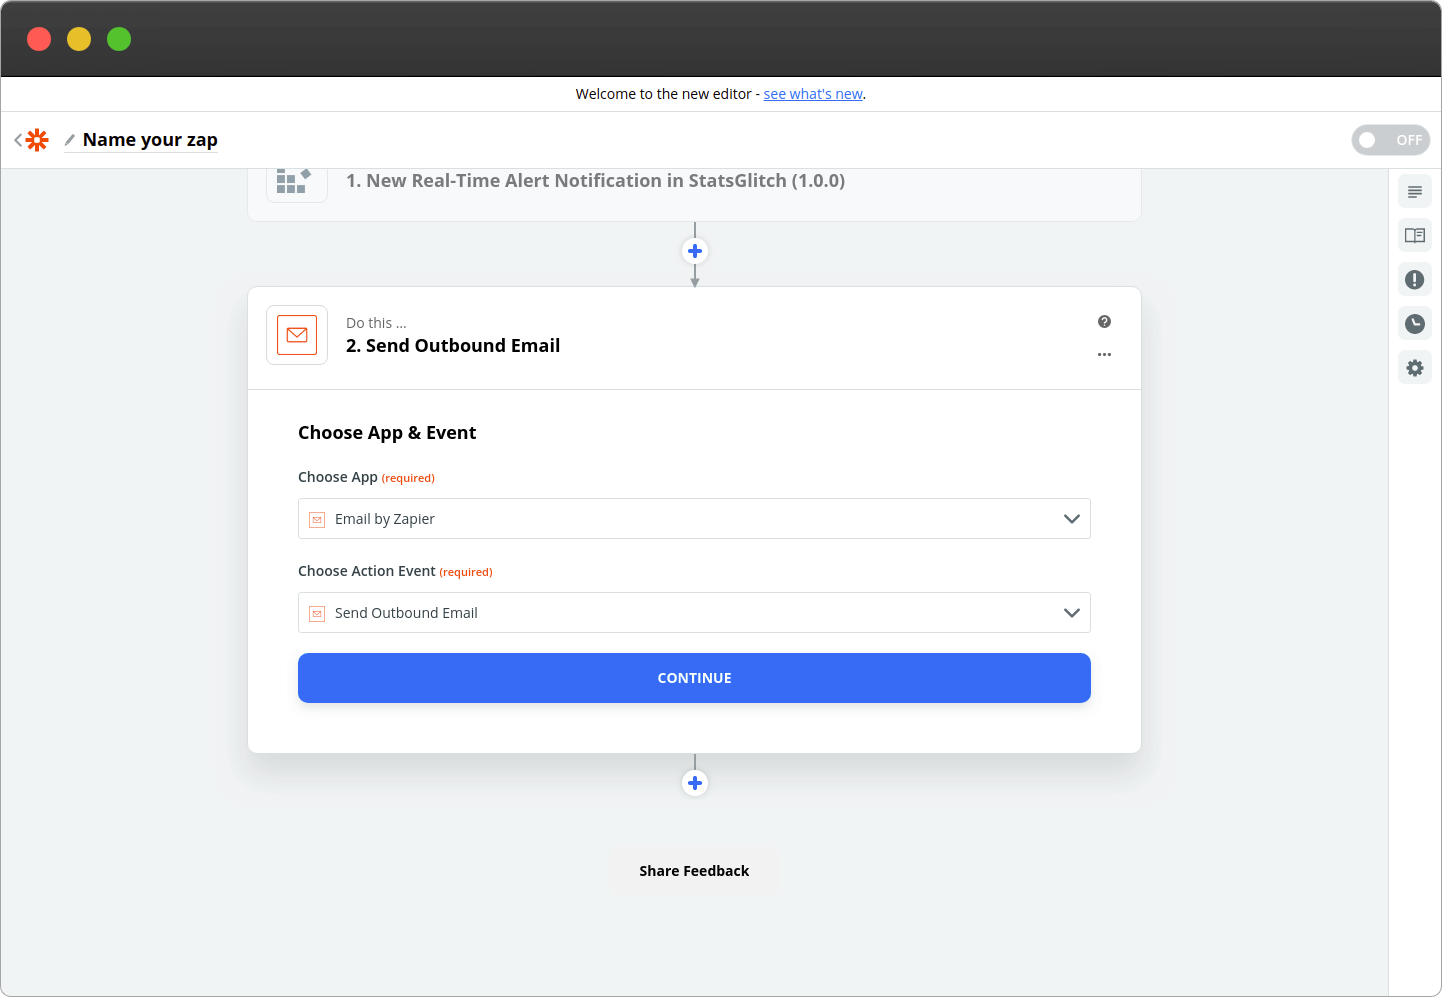
You’ll then get to choose an action app, for this example, choose "Email by Zapier", but you could choose any app that you want:
Enter the desired email subject/body, and you can include data received by the StatsGlitch alert too:
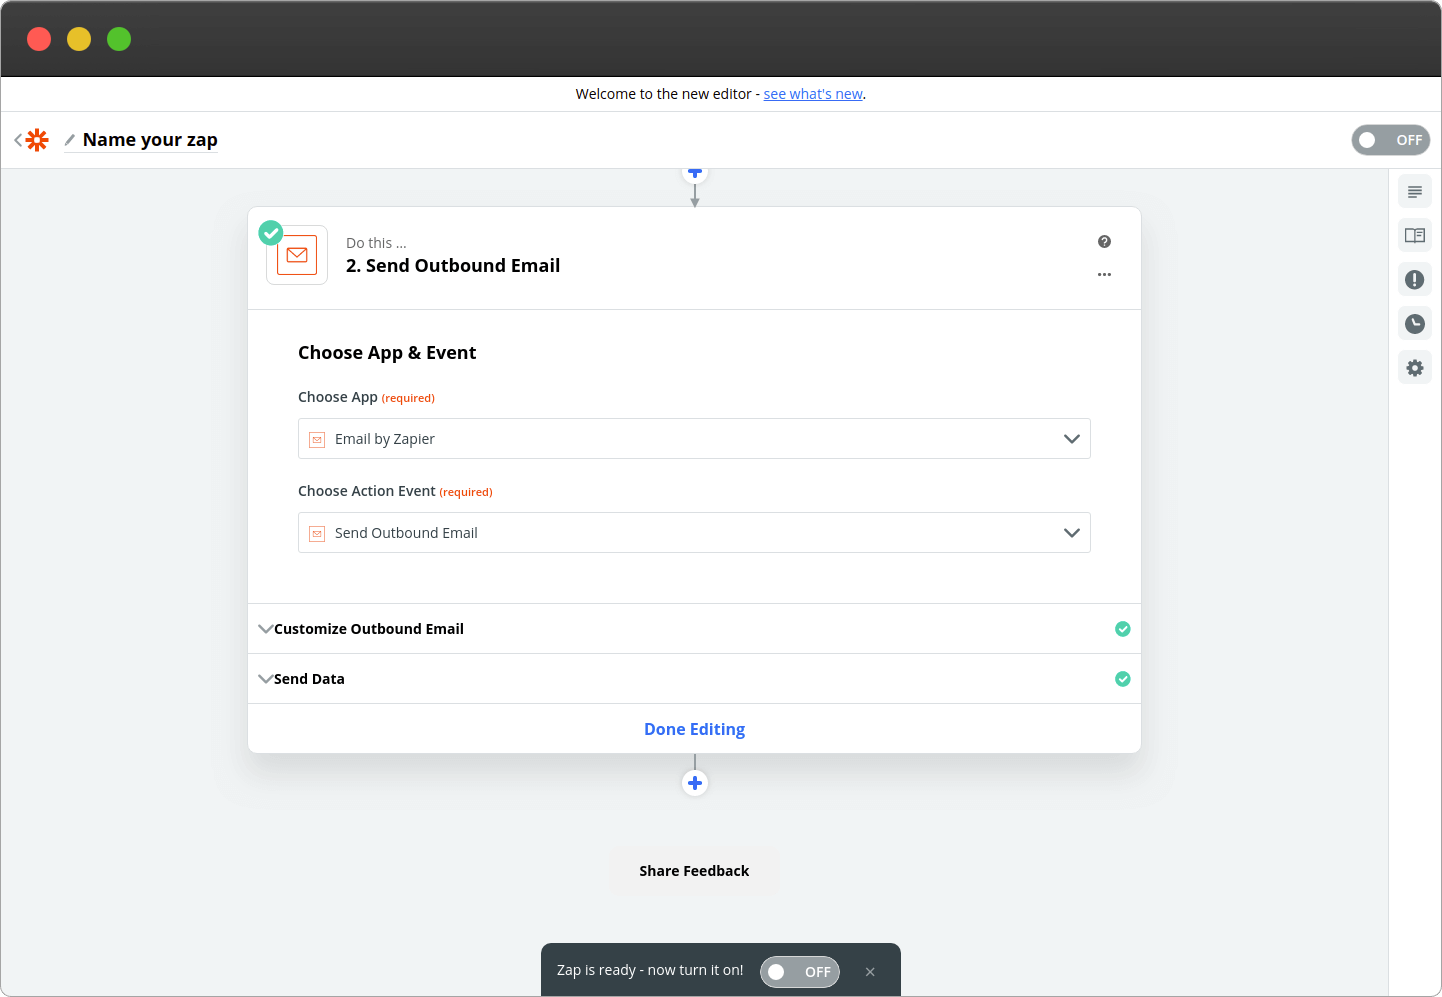
Finally, click the "Done Editing" and turn the Zap on:
6 more examples of Google Analytics and Zapier integration
- Google Analytics page visit -> SMS notification: Receive SMS when a user visits an important page. For example, arrives to a thank you page after a purchase
- Google Analytics registers new traffic from a social network -> Slack notification: Receive a slack notification if there was an unexpected spike from Facebook, Twitter, or any other social network
- Google Analytics registers no traffic for yesterday -> Trello card: Create a new Trello card if there is no site traffic, to investigate the reason why
- Google Analytics notices a drop of signup events -> new Jira ticket: Create a new Jira ticket if there is a drop of certain Events
- Google Analytics Event -> Salesforce creates a record: Create a Salesforce record based on the Google Analytics Event
- Google Analytics >100 Active users -> Microsoft Teams sends a message: When there is significant traffic send a message to Microsoft Teams channel
Now you know:
- How to create a Zapier account
- How to connect Google Analytics to Zapier in two different ways
- Examples of how to benefit from Google Analytics and Zapier integration